A few weeks ago, I started a new job. Along with that job came a new iMac and Touch Bar MacBook Pro. Having doubled the number of computers in my life, I quickly found that my frequently-used Open on Mac iOS Shortcut was not working as expected.
While at work, attempting to open a webpage on my iMac would result in...nothing. When I got home, I found the pages open and waiting for me on my personal iMac.
Prior to the newly acquired computers, I had never given much thought to why webpages opened on my iMac rather than my MacBook Pro. I spent 98% of my time on the iMac and, since it was doing what I wanted it to do, there was no reason to ask why. I mostly assumed it was because the MacBook Pro was asleep and the iMac is always awake.
As it turns out, the real reason webpages always opened on my personal iMac is because it has the fastest internet connection (a wired fiber connection) and would therefore download the Dropbox file containing the URL before any other computers had the chance. Hazel would then do its thing, trash the file, and that was that.
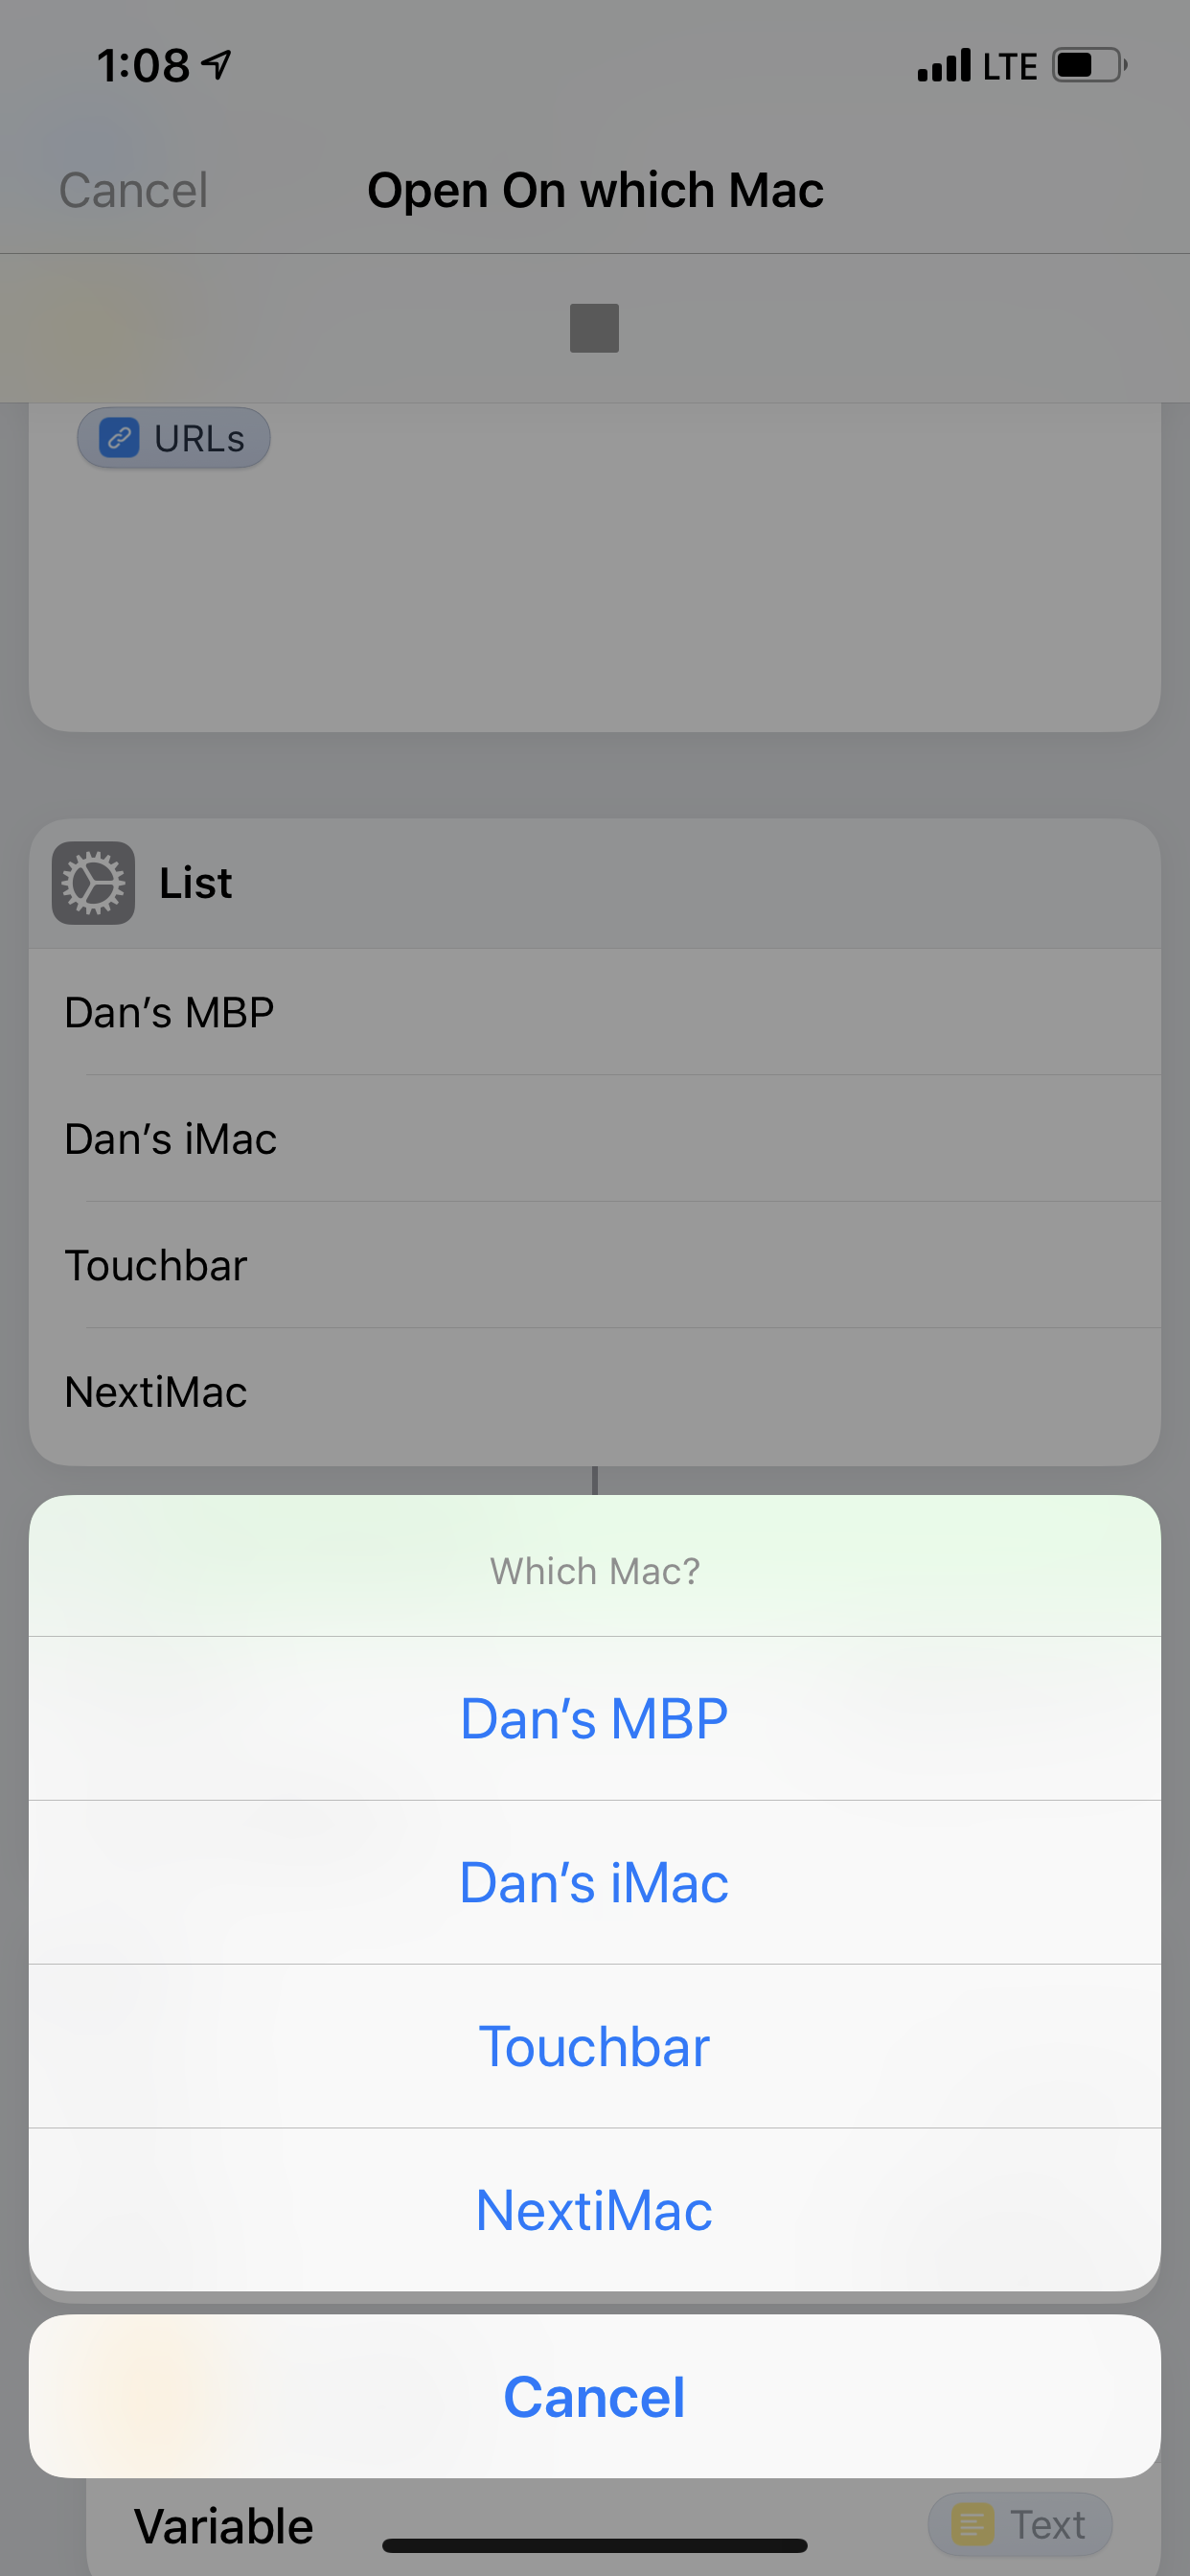
It had become necessary to modify my iOS Shortcut, allowing me to specify on which computer I wanted to open the webpage. To accomplish that goal, I added a "Choose from List" action to the shortcut where I could pick which computer to use. Then, I added short prefixes to the filename that represented each computer.
The original text file containing the page URL was called "URL-Current Date.txt". The new file names are:
The Touch Bar: tbr-URL-Current Date.txt
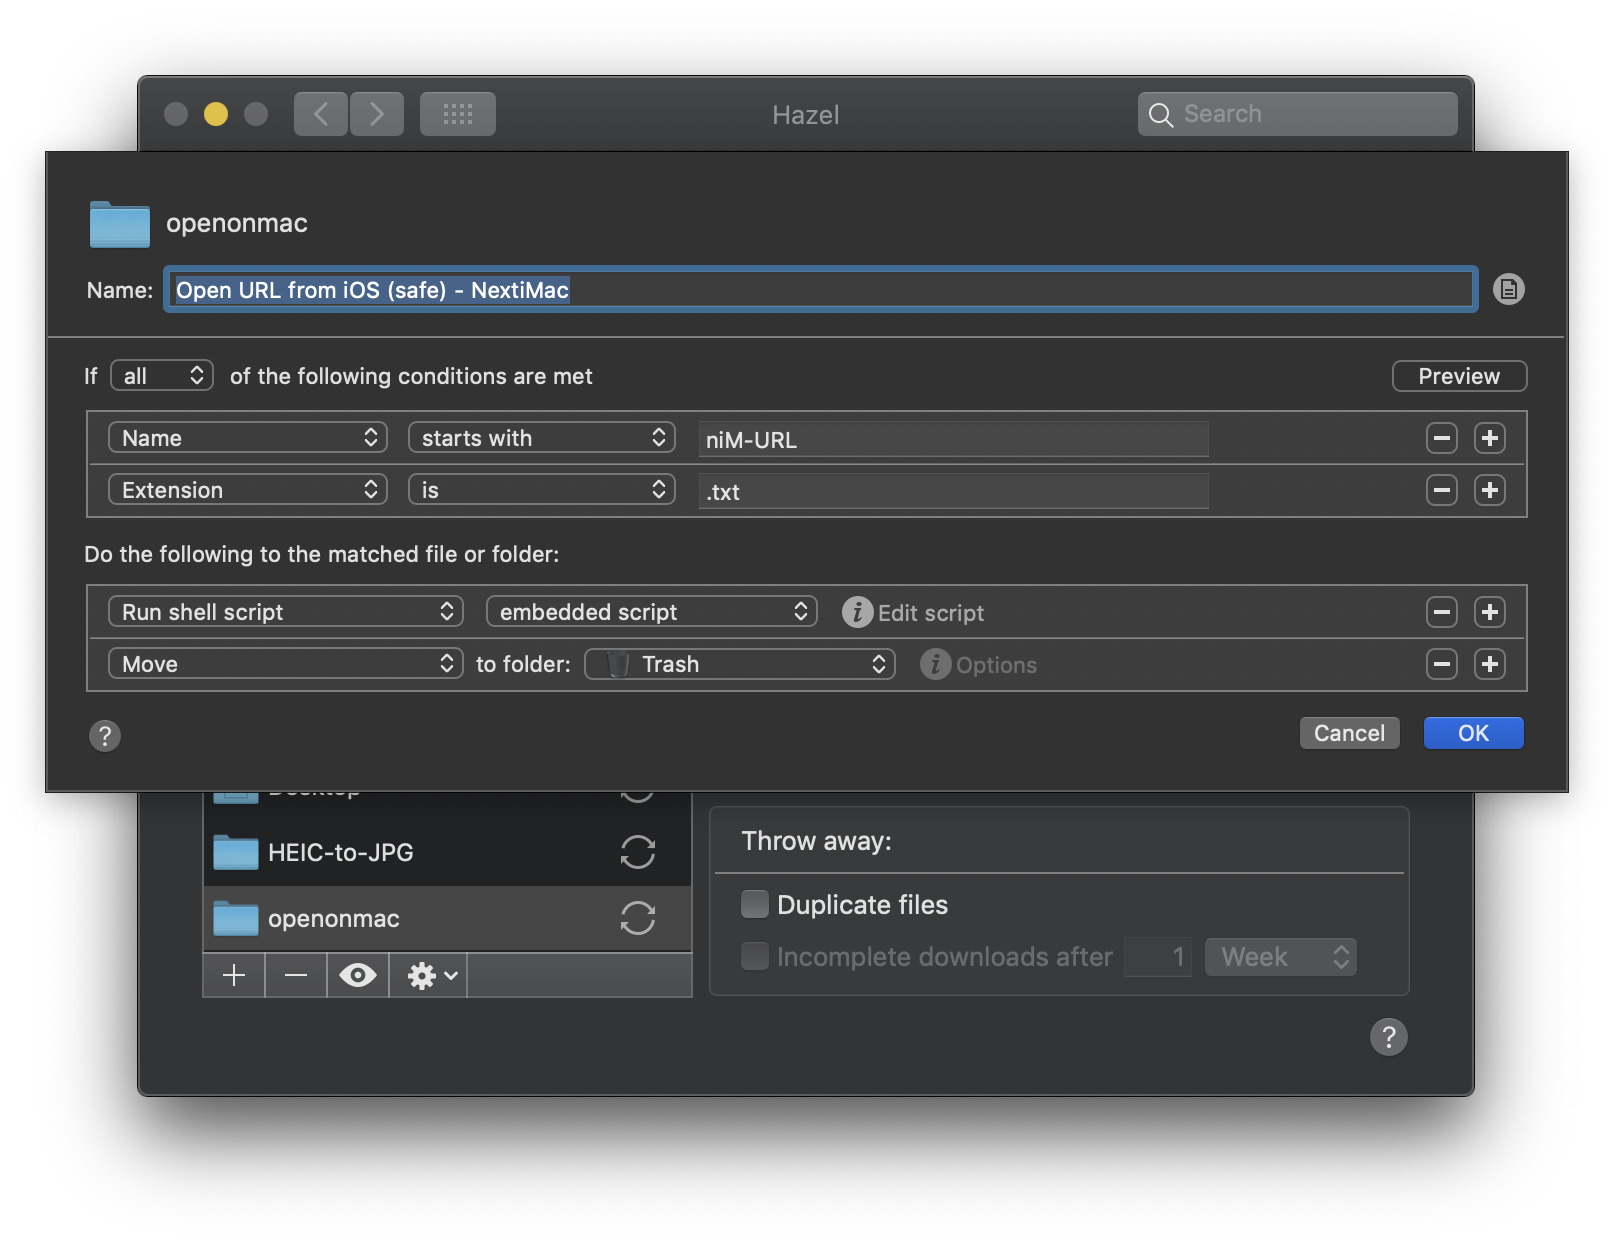
The New iMac: niM-URL-Current Date.txt
My MacBook Pro: mbp-URL-Current Date.txt
My iMac: diM-URL-Current Date.txt
Add a couple of "If" statements to the shortcut and we're about done. Here's what the new, much longer shortcut looks like.
These If statements are terrible and ugly and there’s got to be a better way to do this, but I don't know what it is.
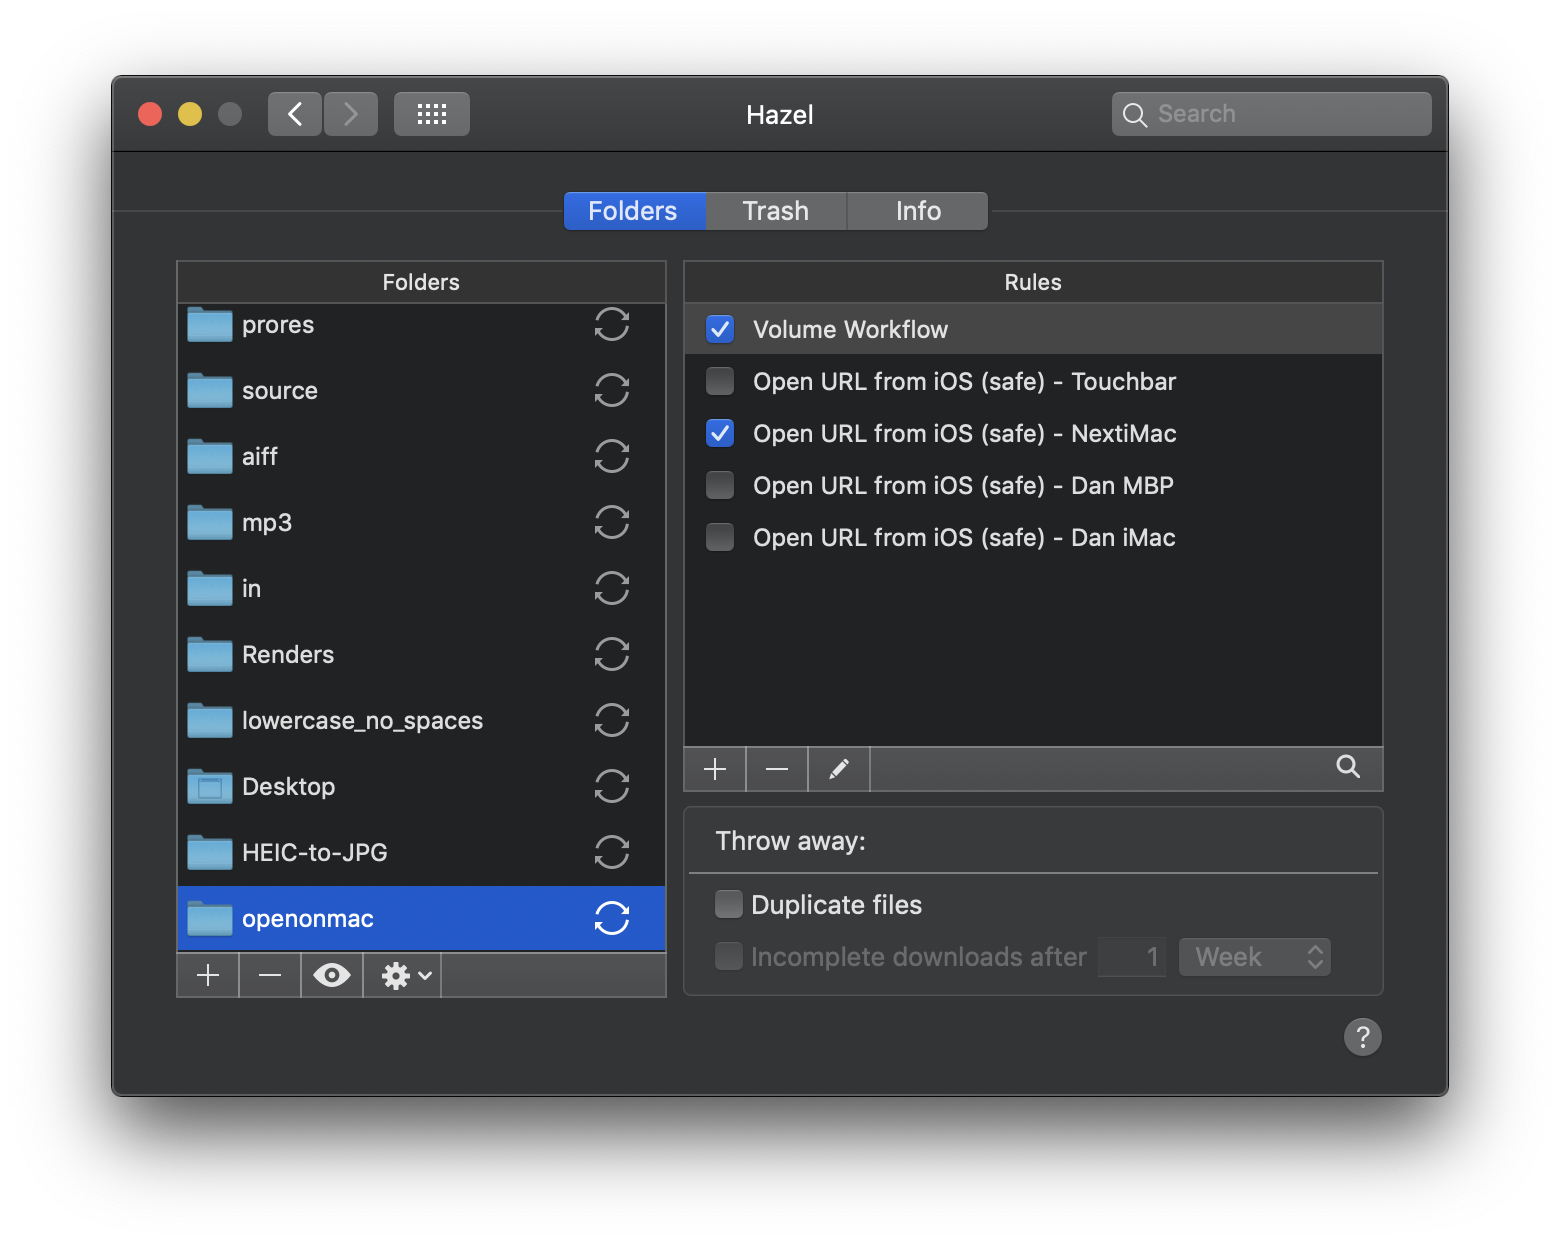
After finishing the shortcut, all that was left to do was add the prefixes to the name search field in the Hazel rules running on each computer and call it done.
P.S. Thank you, again, to Jason Snell for fixing my very unsafe, poorly conceived version 1.0.
I love podcasts. And I love when my friends on the internet share the podcasts they love.
One of the most common ways people share their podcast recommendations is with a link from their podcast player app, which, more often than not, is Overcast. I, however, am primarily a Castro user.
I can't count how many times I've opened an Overcast link on social media, switched over to Castro, searched for that podcast by name in the Castro "Discover" tab, then added the recommended episode to my Queue for listening later. An incredibly inefficient and annoying workflow.
Oh, how I wish I could just press a button and have that Overcast link open in Castro, showing me the episode ready to be queued.
URLs, Links, Etc
Both Overcast and Castro support public URLs for sharing shows and individual episodes. This is in addition to the apps' specific iOS URL schemes.
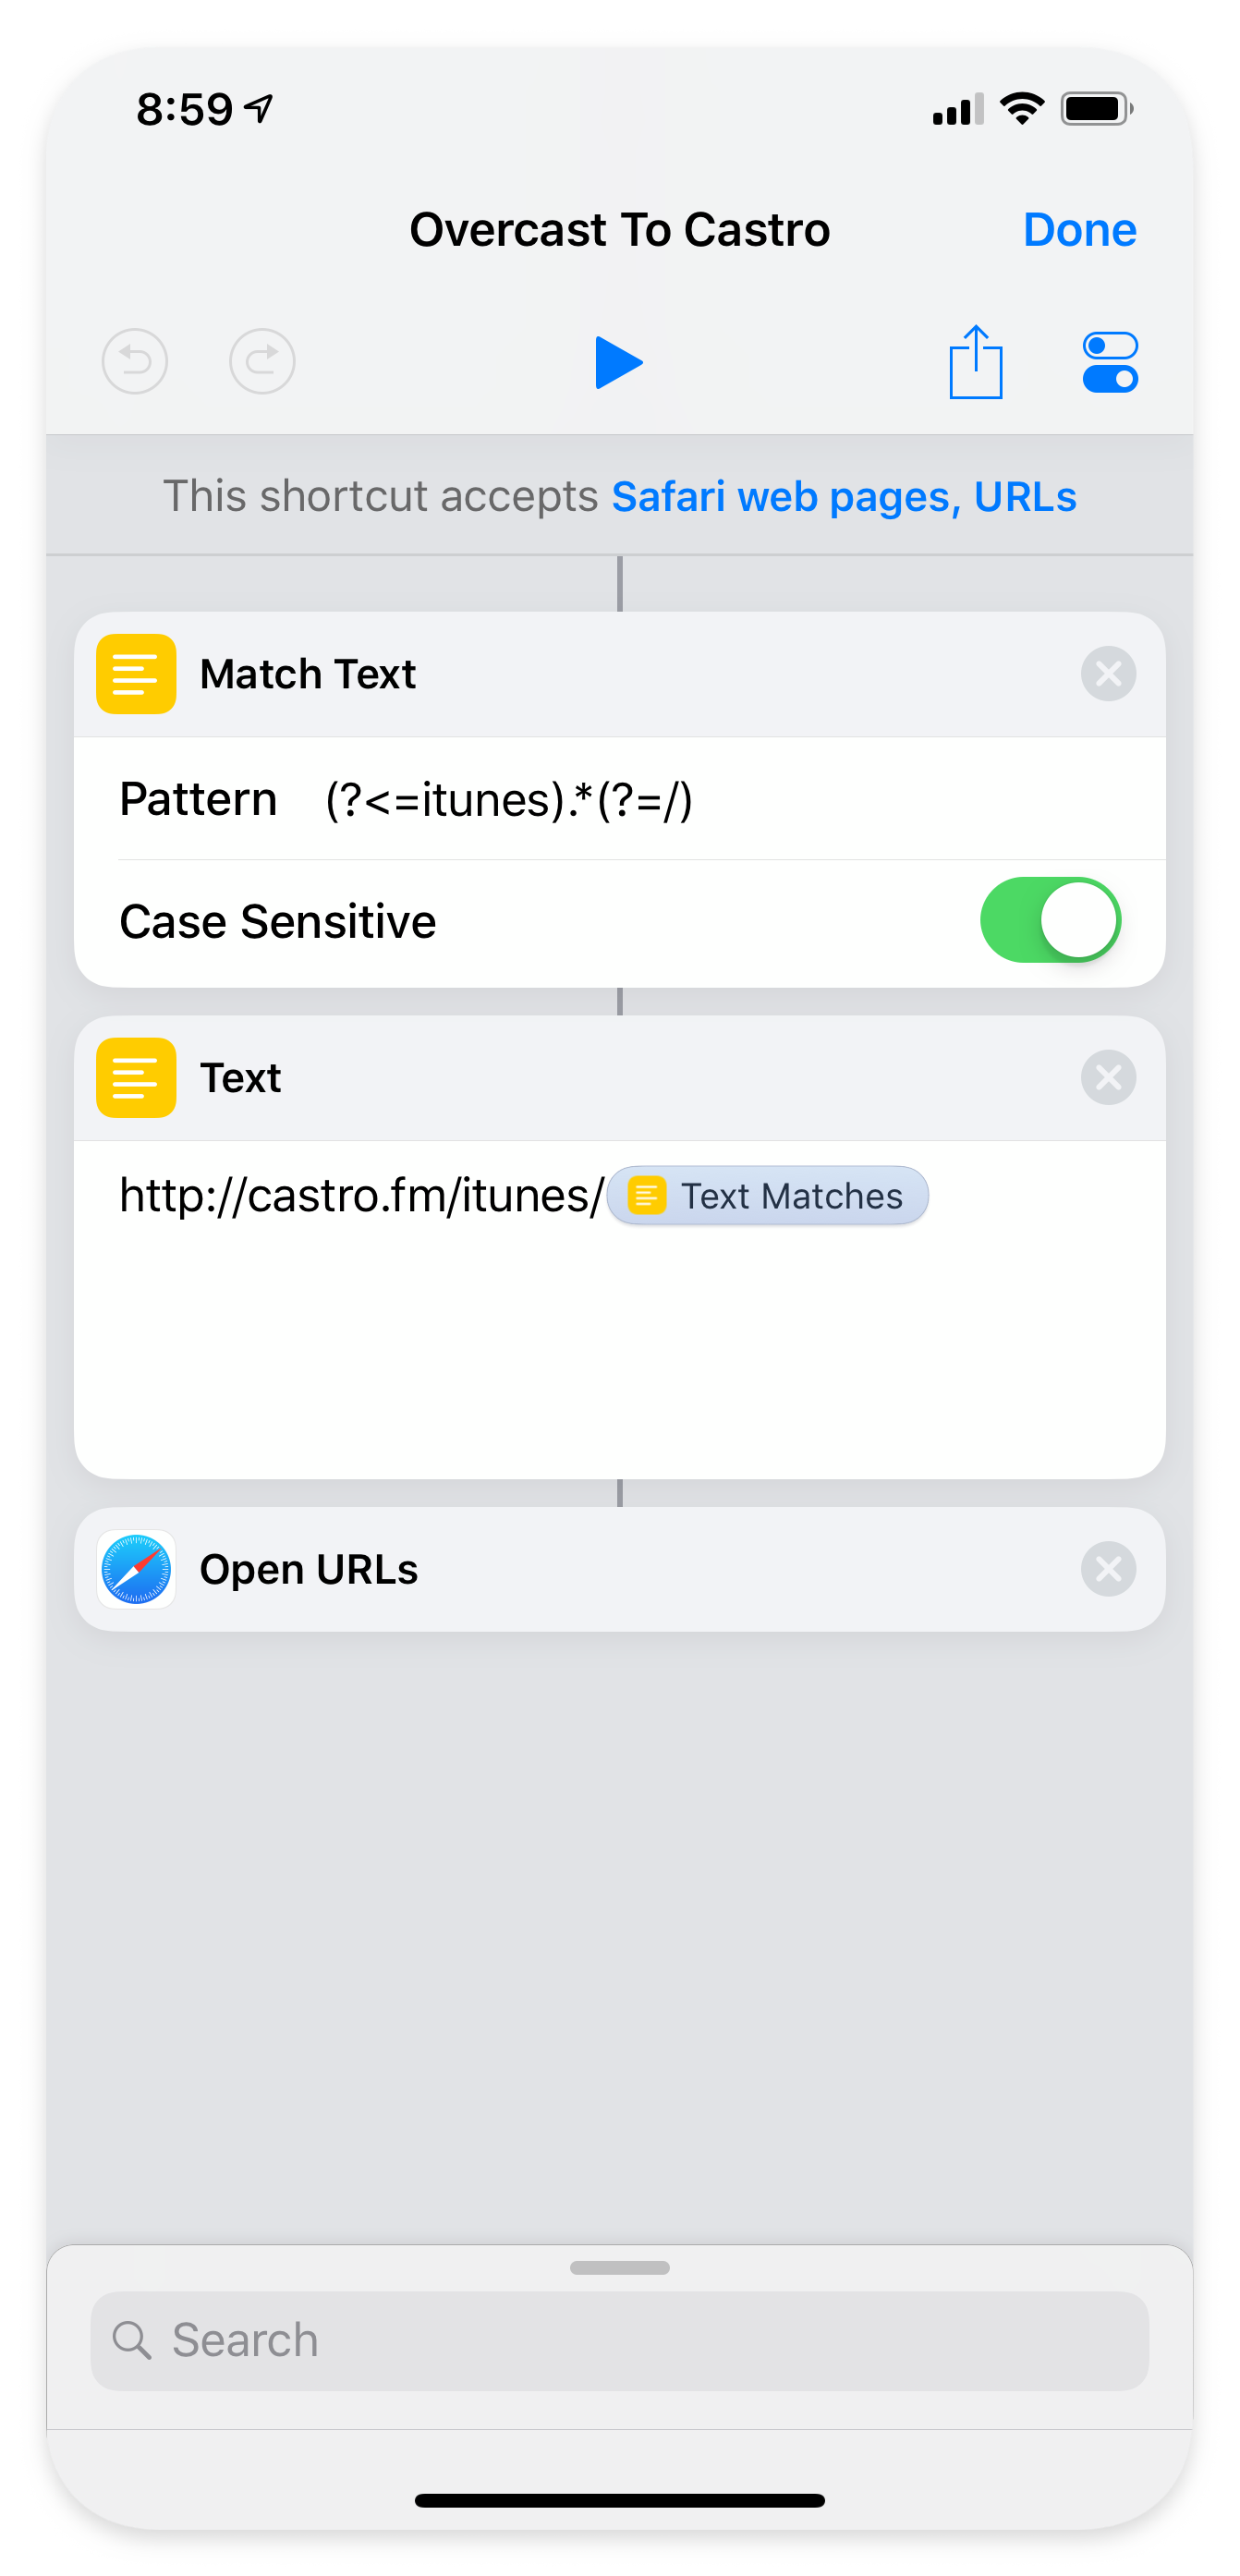
I have no idea how either of these apps are generating their episode-specific URLs, but the URLs for the main feed of a podcast use the podcast's iTunes ID. The Overcast and Castro links for the Defocused main feed are https://overcast.fm/itunes891398524 and https://castro.fm/itunes/891398524, respectively.
Which means I can create a quick Shortcut to swap an Overcast link for a Castro link.
Half of a Solution
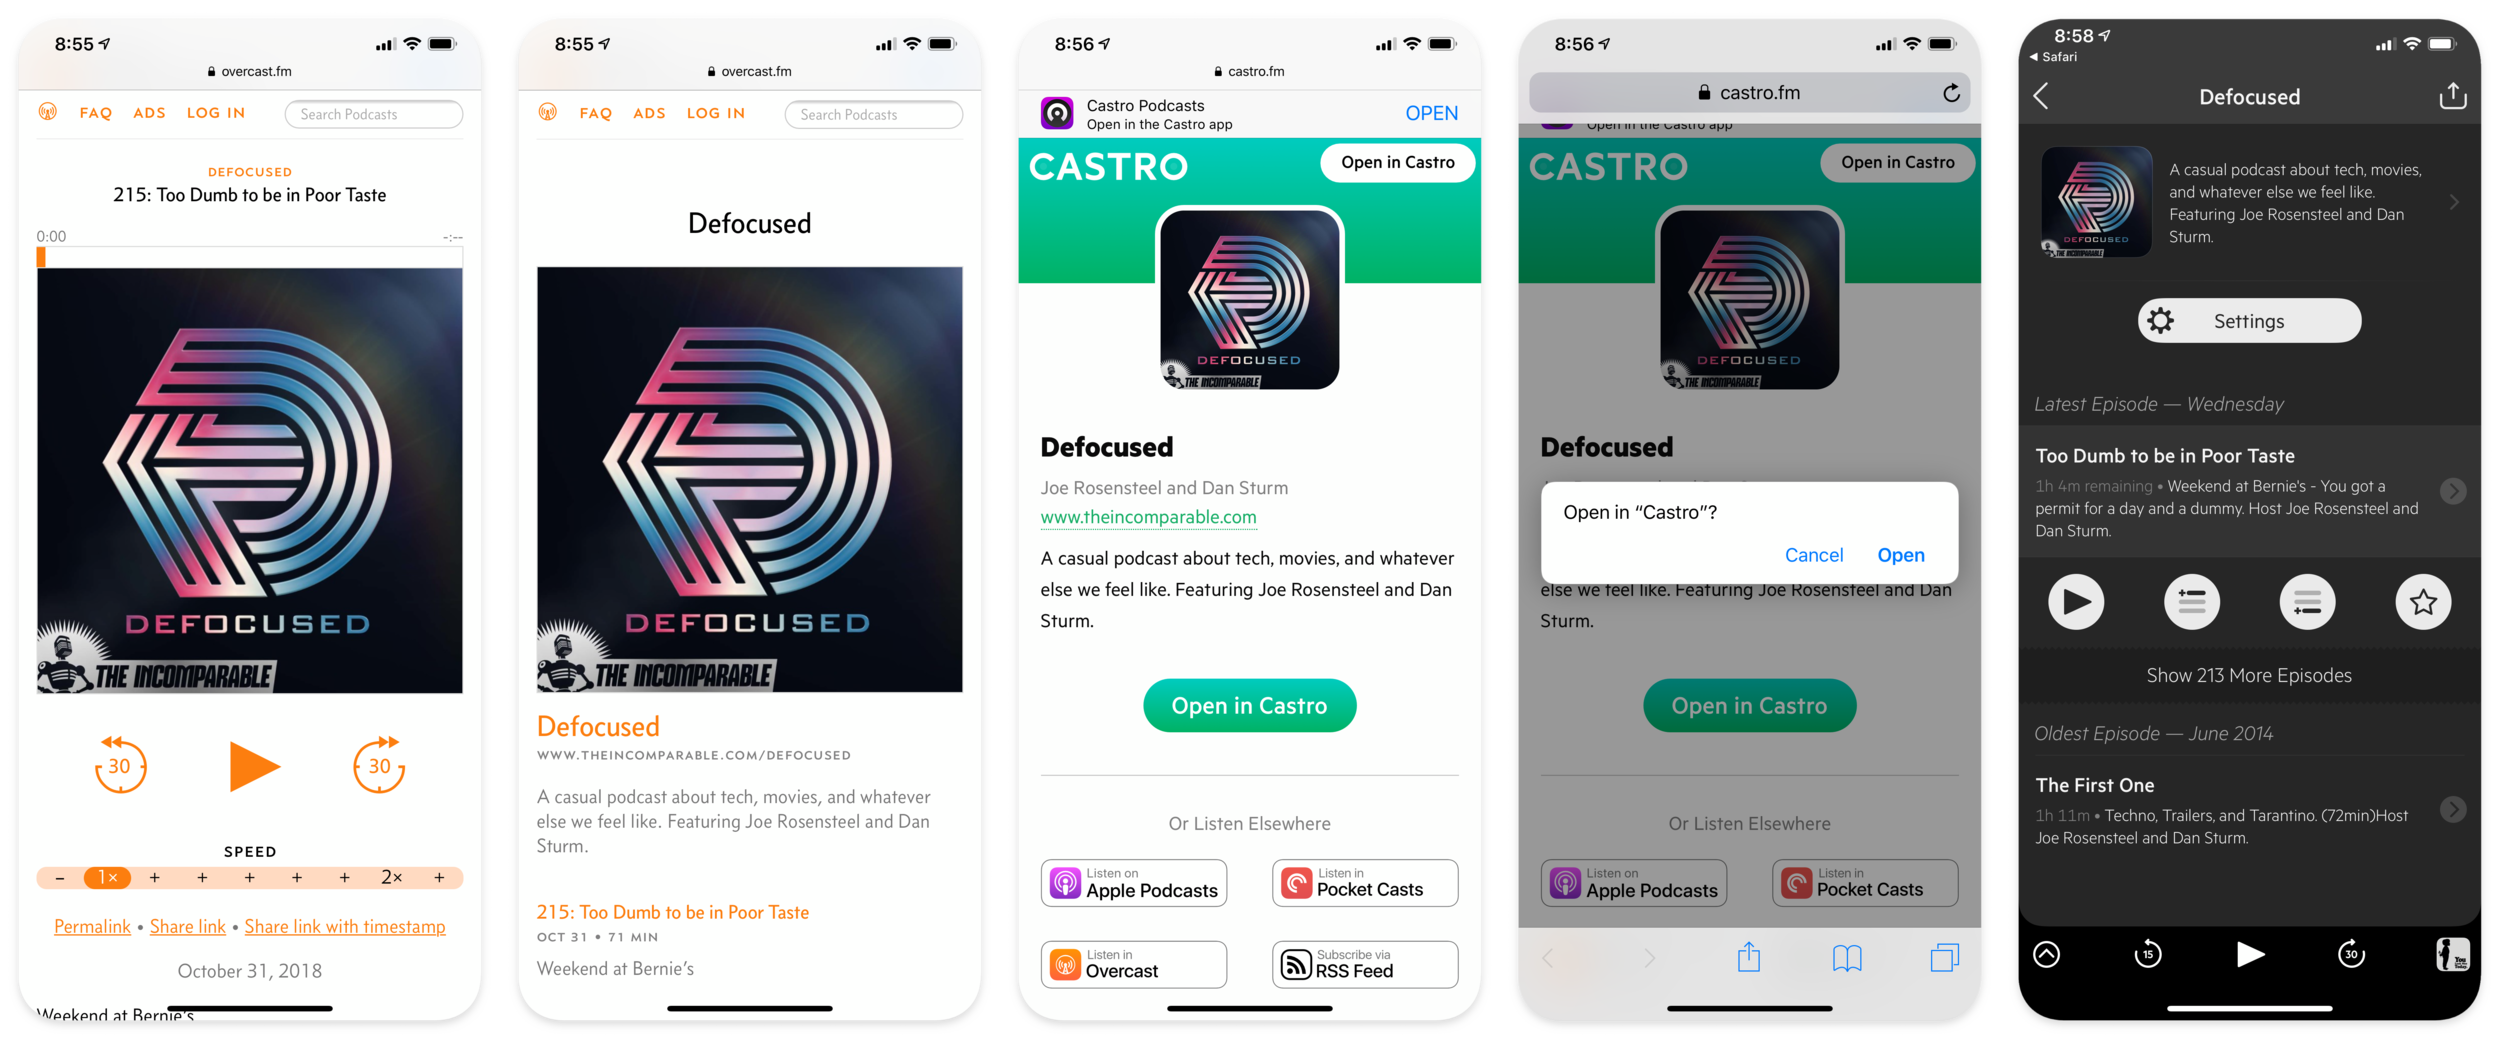
Since this shortcut only works on a podcast's main feed URL, not an episode specific URL, I still have to do some work to get the podcast episode into my Castro Queue. I have to open the Overcast link, tap on the name of the podcast at the top of the player to go to its main feed, run the shortcut, tap the "Open in Castro" button, tap the button that allows Safari to actually open Castro, then find and add the specific episode to my Queue.
Look how pretty these screenshots are. They were made with Stu Maschwitz’s “Big Tennis Screenshots” Shortcut, which you can download here .
Not ideal, but much more pleasant than manually searching for the name of the show. Especially if episode being shared by the Overcast user happens to be the most recent episode of the show since Castro loads with the Action buttons for that episode ready to tap.
Maybe one of these days I or, more likely, one of you much smarter people, will figure out how to translate episode specific URLs that open directly within Castro (or Overcast), avoiding all these Safari links as a bridge. Heck, while I'm wishing for unlikely things, maybe Castro will finally get timestamped URLs, too. One can dream, right?
Yesterday, while trying to address a note on a near-finished animation, I discovered the need for a new tool in my Node Sets toolbox that was both useful and trivially simple to create. A rare combination when it comes to my code.
The original intended use for the Node Sets tagging tools was that animated nodes would be tagged as you work and, when you need to adjust an animation's timing, you would run the "Show Nodes" command to open all of the tagged nodes. The idea being, you'll need to open not only the nodes that need to be adjusted, but also all of the other relevant animated nodes for timing and context.
The problem I encountered involves this methodology's inability to scale with the modularity of larger projects. One of the main benefits of a node-based workflow is the ability to create any number of blocks of operations, separate from the main process tree, then connect and combine them as necessary. Each of these blocks would have its own set of animated nodes, building a piece of the overall animation.
But the comp I was working on yesterday had 140 tagged animated nodes and, while it would technically still work to open all of them every time I need to make a timing change, it's slow and unwieldy to have 140 node property panes open at the same time.
A solution I proposed to this issue in the v1.0 blog post was the ability to use a different tag for different types or groups of nodes and open them each independently. A fine idea that I never personally implemented because the tags are hard coded into the tool and there's no way to add more tags without closing the app, modifying the menu.py file, and cluttering up the toolset with a lot of similarly named tools. A terrible workflow.
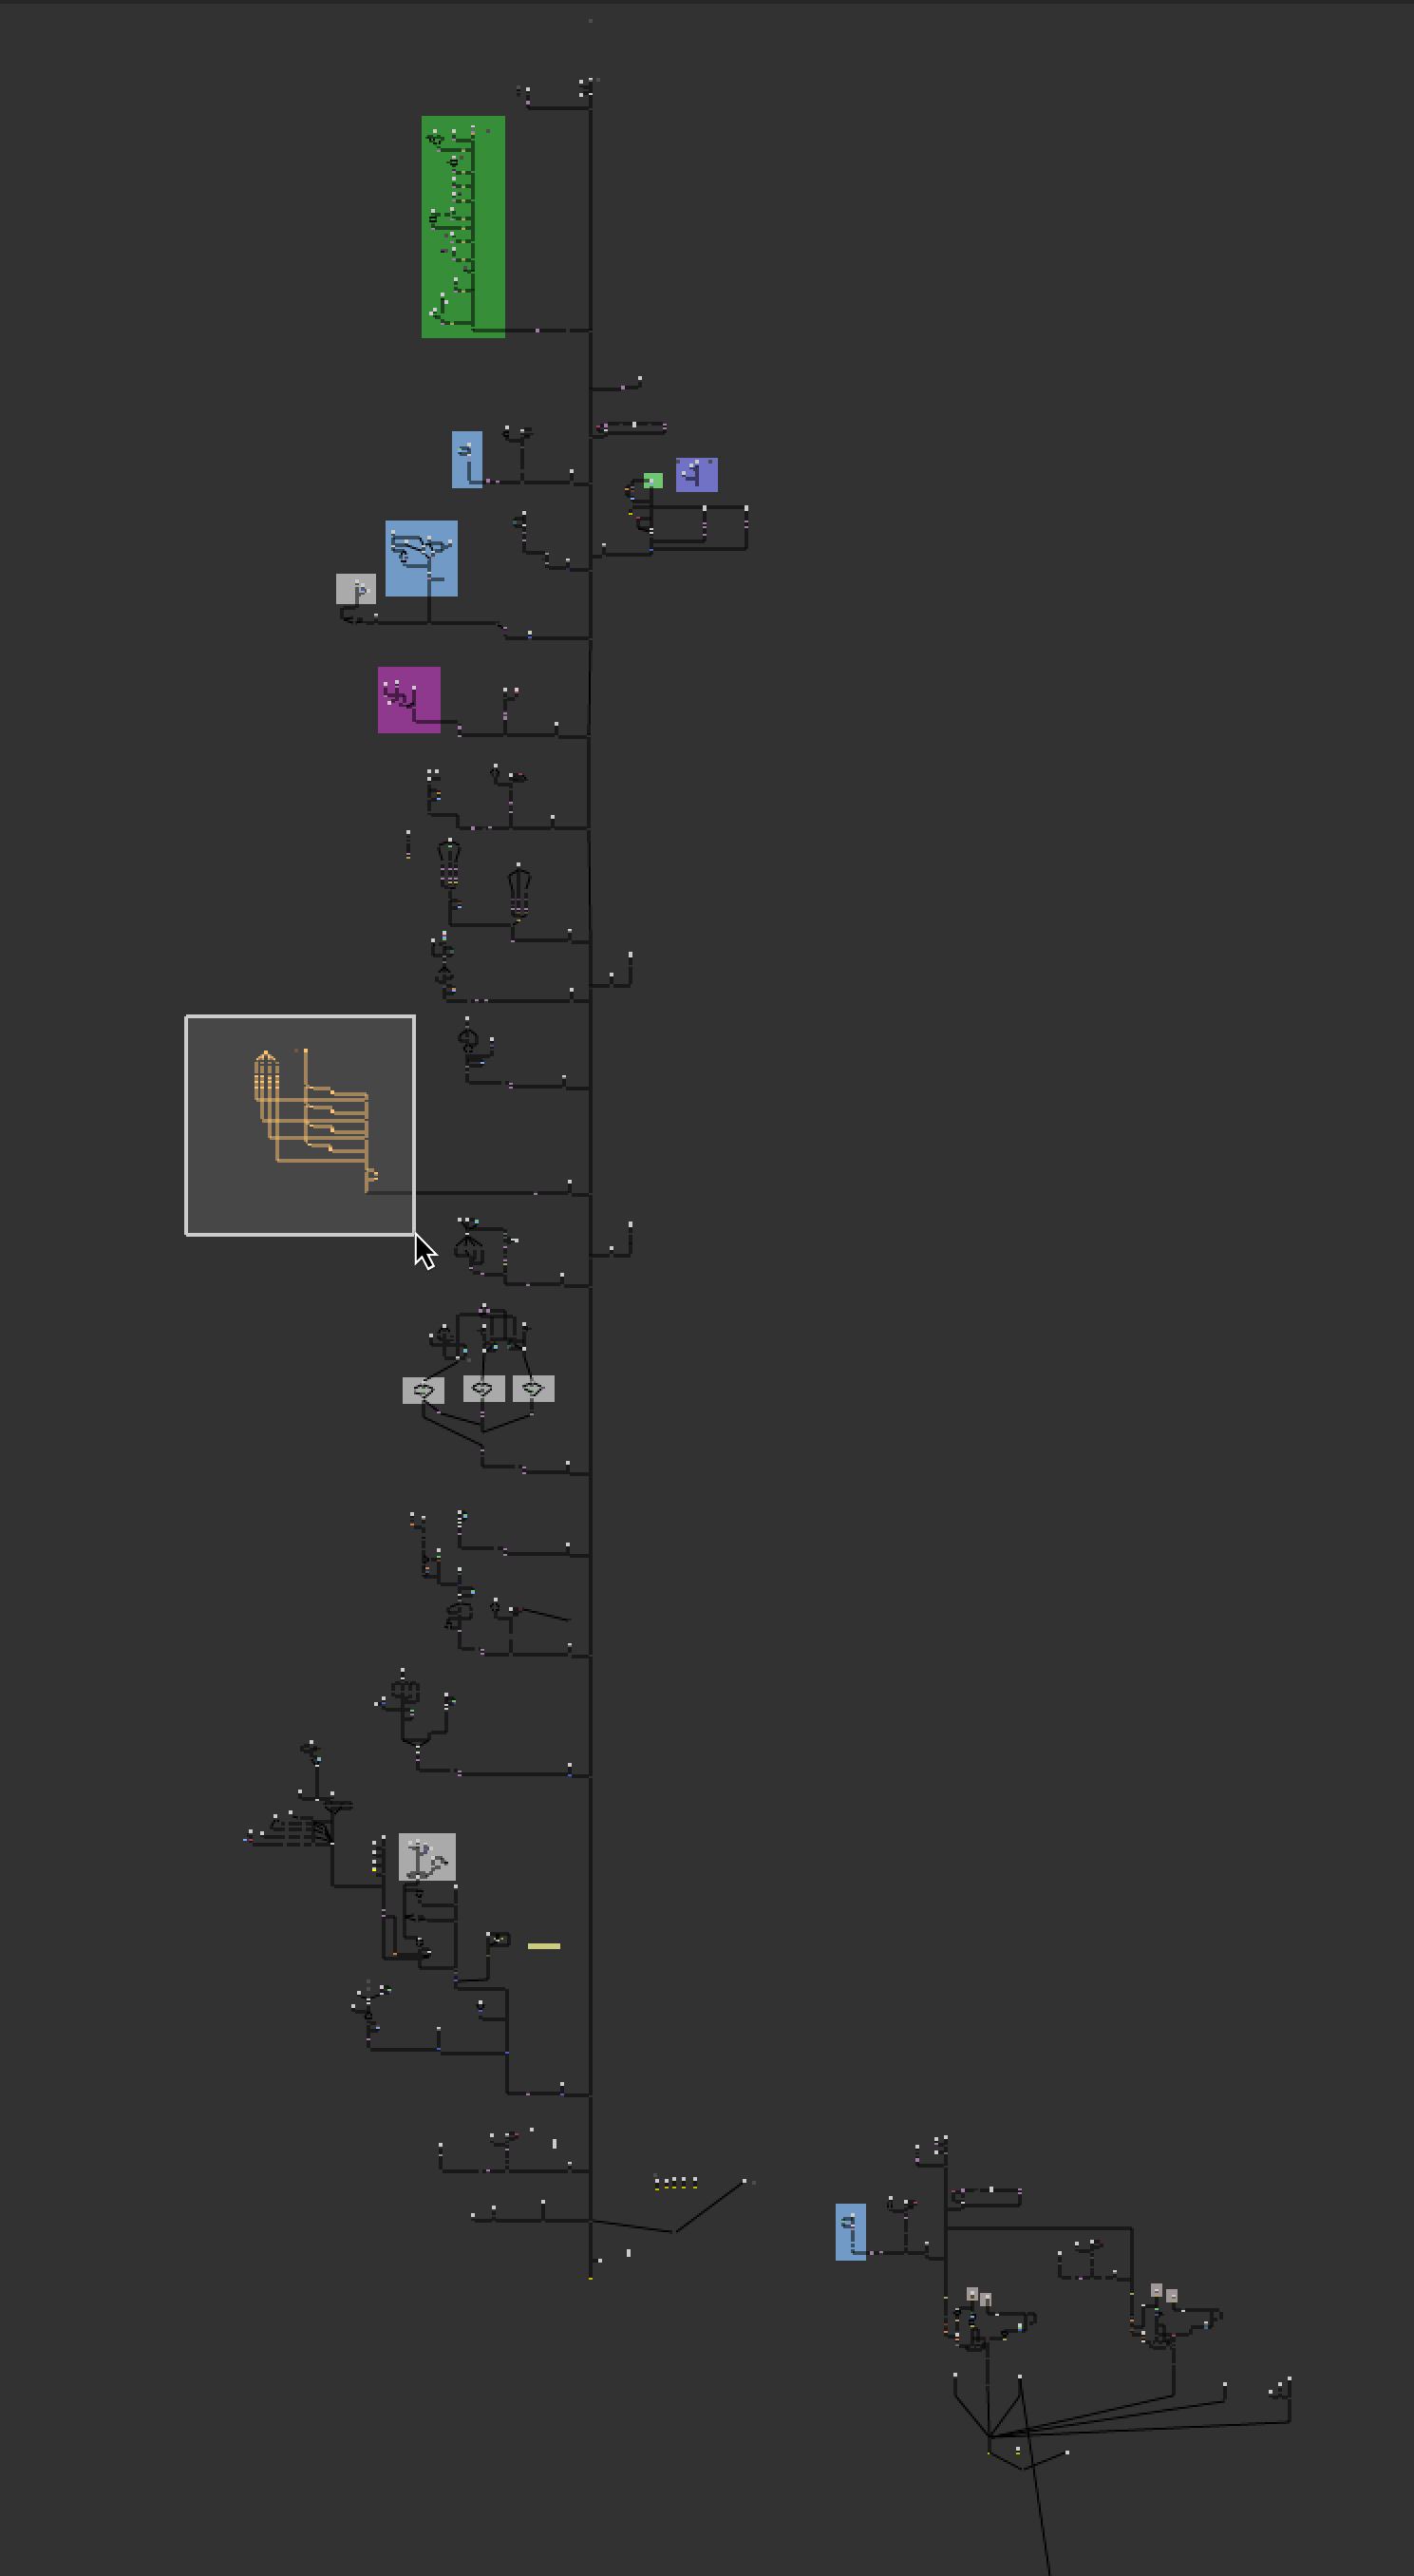
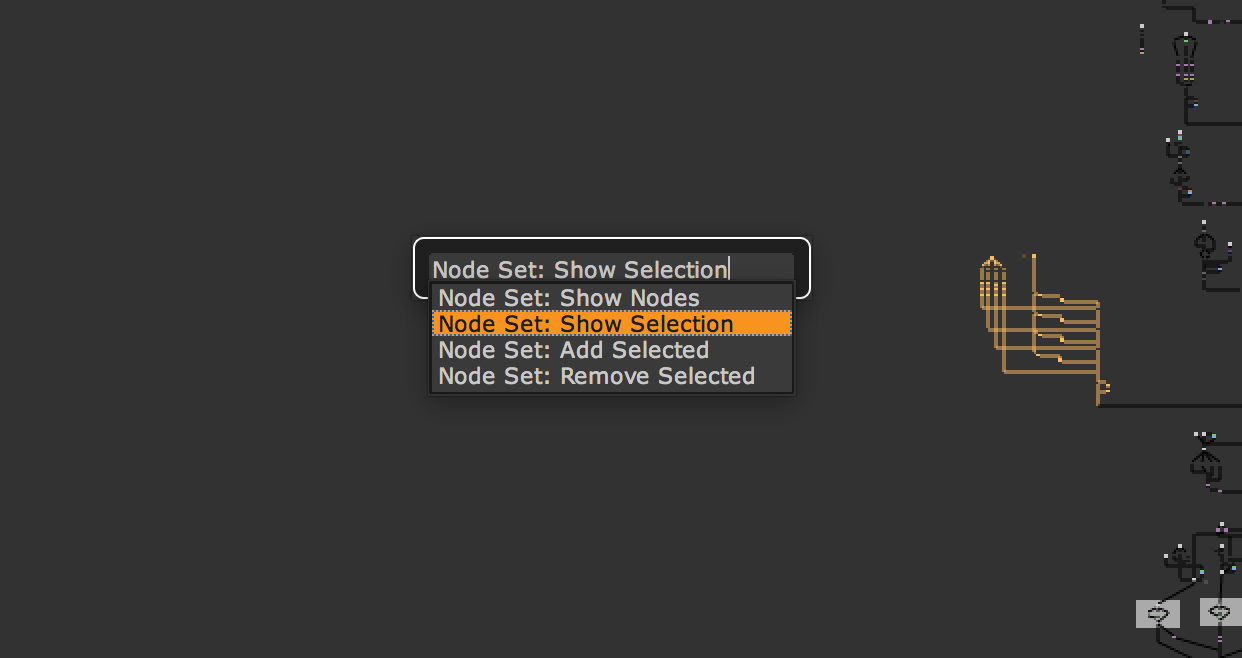
A solution that solves this problem in a much simpler, smarter way is to use a selection of nodes to narrow the search for tags. So, when working on a smaller section of the animation, I can select a block of nodes and run the new command "Node Set: Show Selection" to open the tagged nodes contained within.
The selected block of nodes used to search for tagged nodes.
The Code
Like I mentioned at the top of this post, the code for this new addition was exceptionally simple. Specifically, I duplicated and renamed the "Node Set: Show Nodes" code, and changed one word. In the function's for loop, I changed nuke.allNodes() to nuke.selectedNodes(). And that was it. Writing this blog post has already taken several orders of magnitude longer than writing the code.
The full function, called showOnlySelectedNodes(), looks like this:
def showOnlySelectedNodes():
  names = []
  li = []
  for node in nuke.selectedNodes():
    if "inNodeSet" in node['label'].value():
      names.extend([node.name()])
      li.extend([node])
  numPan = nuke.toNode('preferences')['maxPanels']
  numPan.setValue(len(names))
  for i in range(len(li)):
    node = li[i]
    node.showControlPanel()
And the additional line to add the tool to the menu is:
nsets.addCommand('Node Set: Show Selection', 'showOnlySelectedNodes()', icon='NodeSetsMenu-show.png')
It's rare that the solution to an issue I encounter while working is so simple to create that it's quicker to just make the tool than capture a note to create it later, but that was the case with this one and I'm very happy to have this new option.
Head over to the Downloads page to get the full updated Node Sets v1.2 code.
The Arri Alexa remains one of the most common cameras used in production these days. Its proprietary LogC format captures fantastic highlight detail and exceptionally clean imagery.
But with each new proprietary camera format comes a new process for decoding, viewing, and interacting with the camera's footage. Generally speaking, this involves applying a specific LUT to our footage.
Most applications have these LUTs built in to their media management tools. All it takes to correctly view your footage is to select which LUT to use on your clip.
This is, unfortunately, not the full story when it comes to Alexa footage.
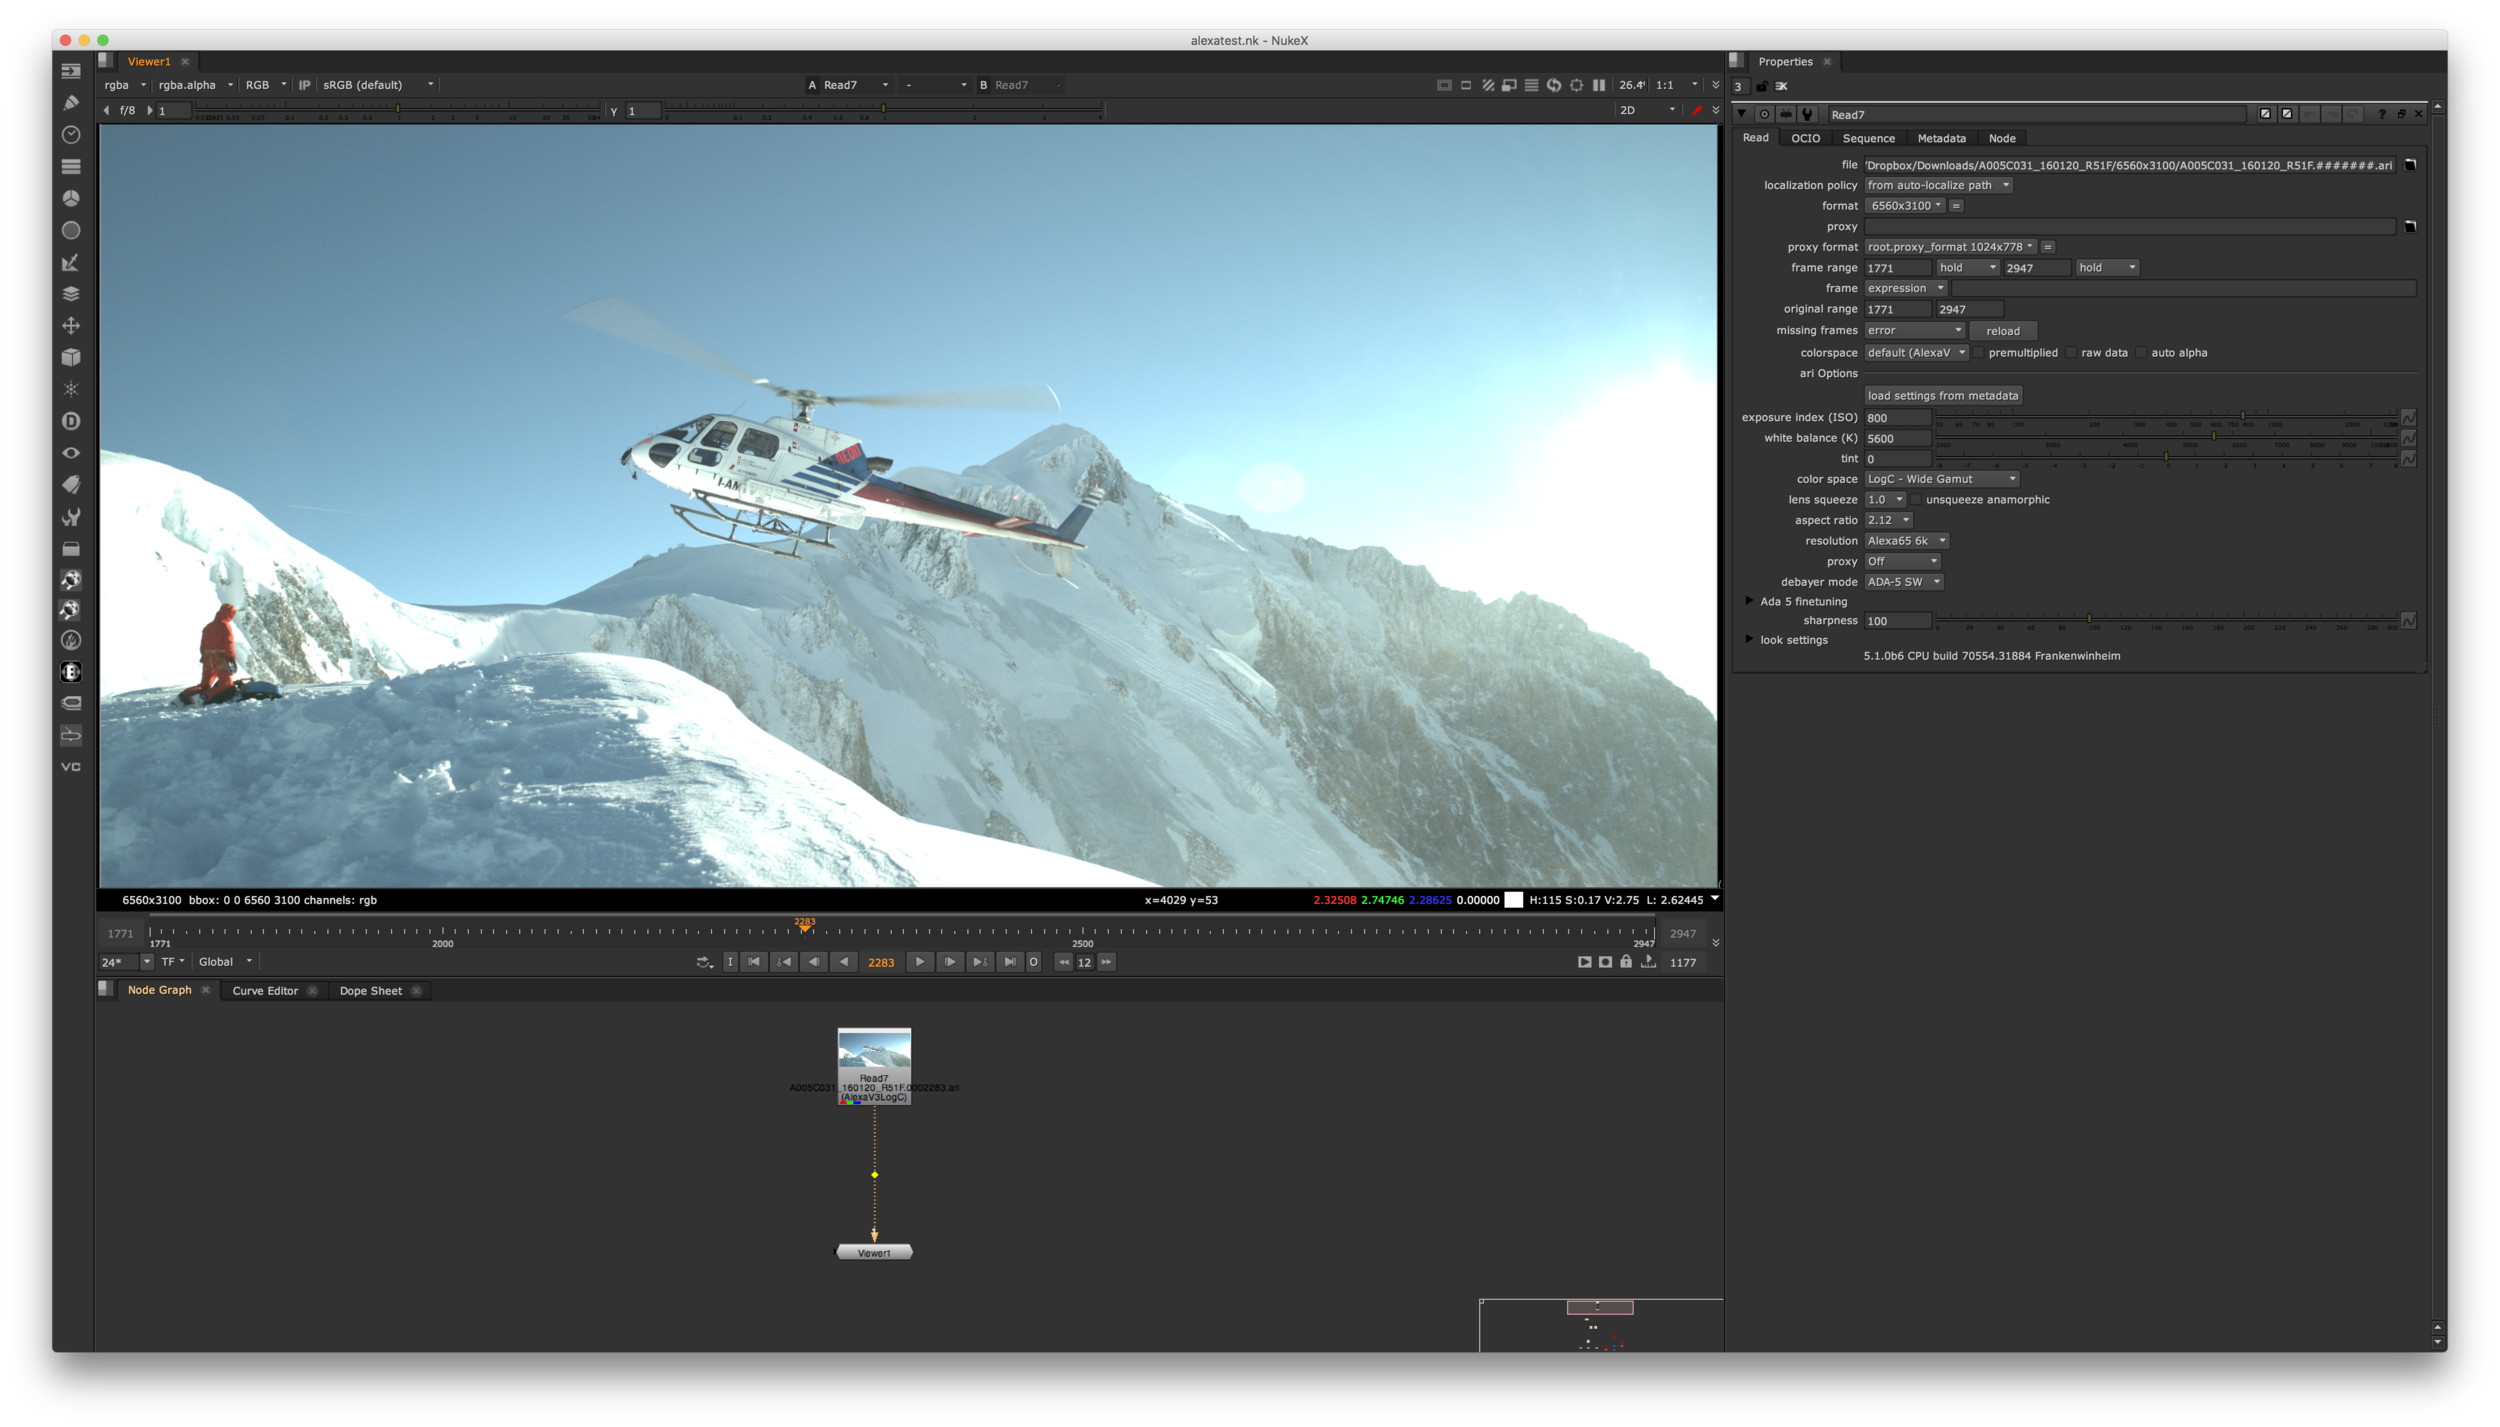
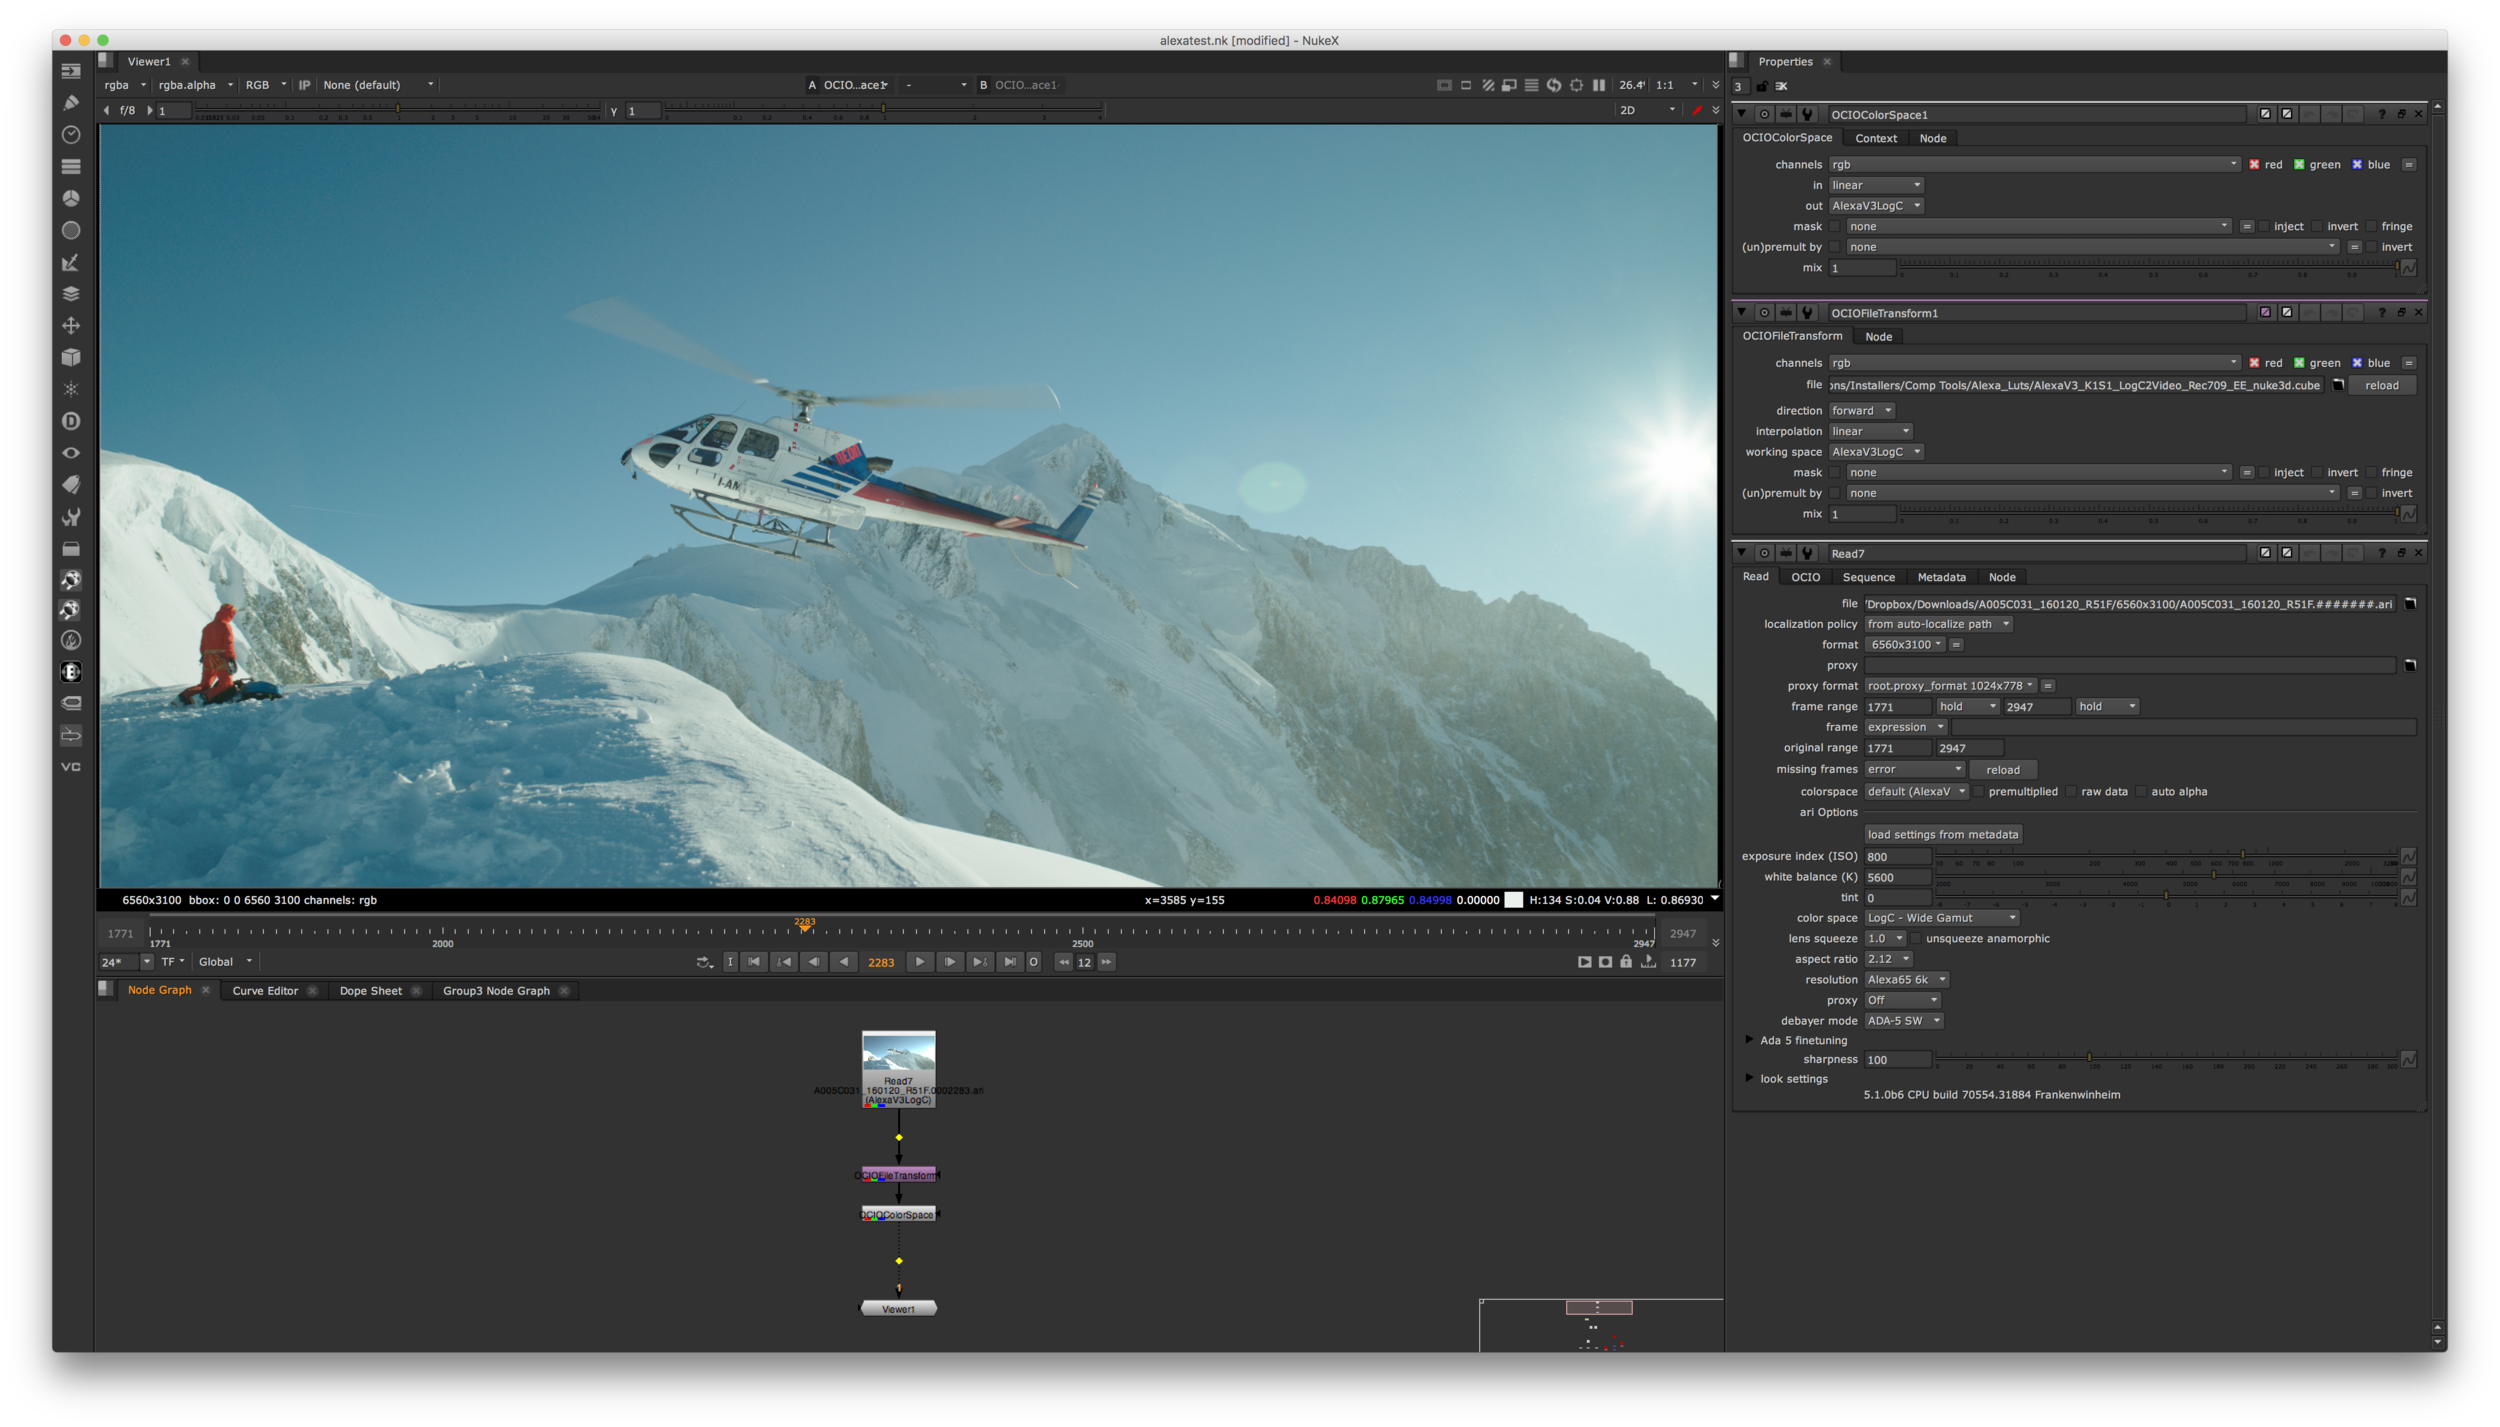
If you've ever imported an Alexa colorspace clip into Nuke, set your Read node to "AlexaV3LogC", and viewed it with the default Viewer settings, you may notice that the highlights look blown out. If you use a color corrector or the Exposure slider on your Viewer, you'll see that the image detail in the highlights is still there, it's just not being displayed correctly.
An Alexa LogC clip being viewed in NukeX with the sRGB Viewer Input Process.
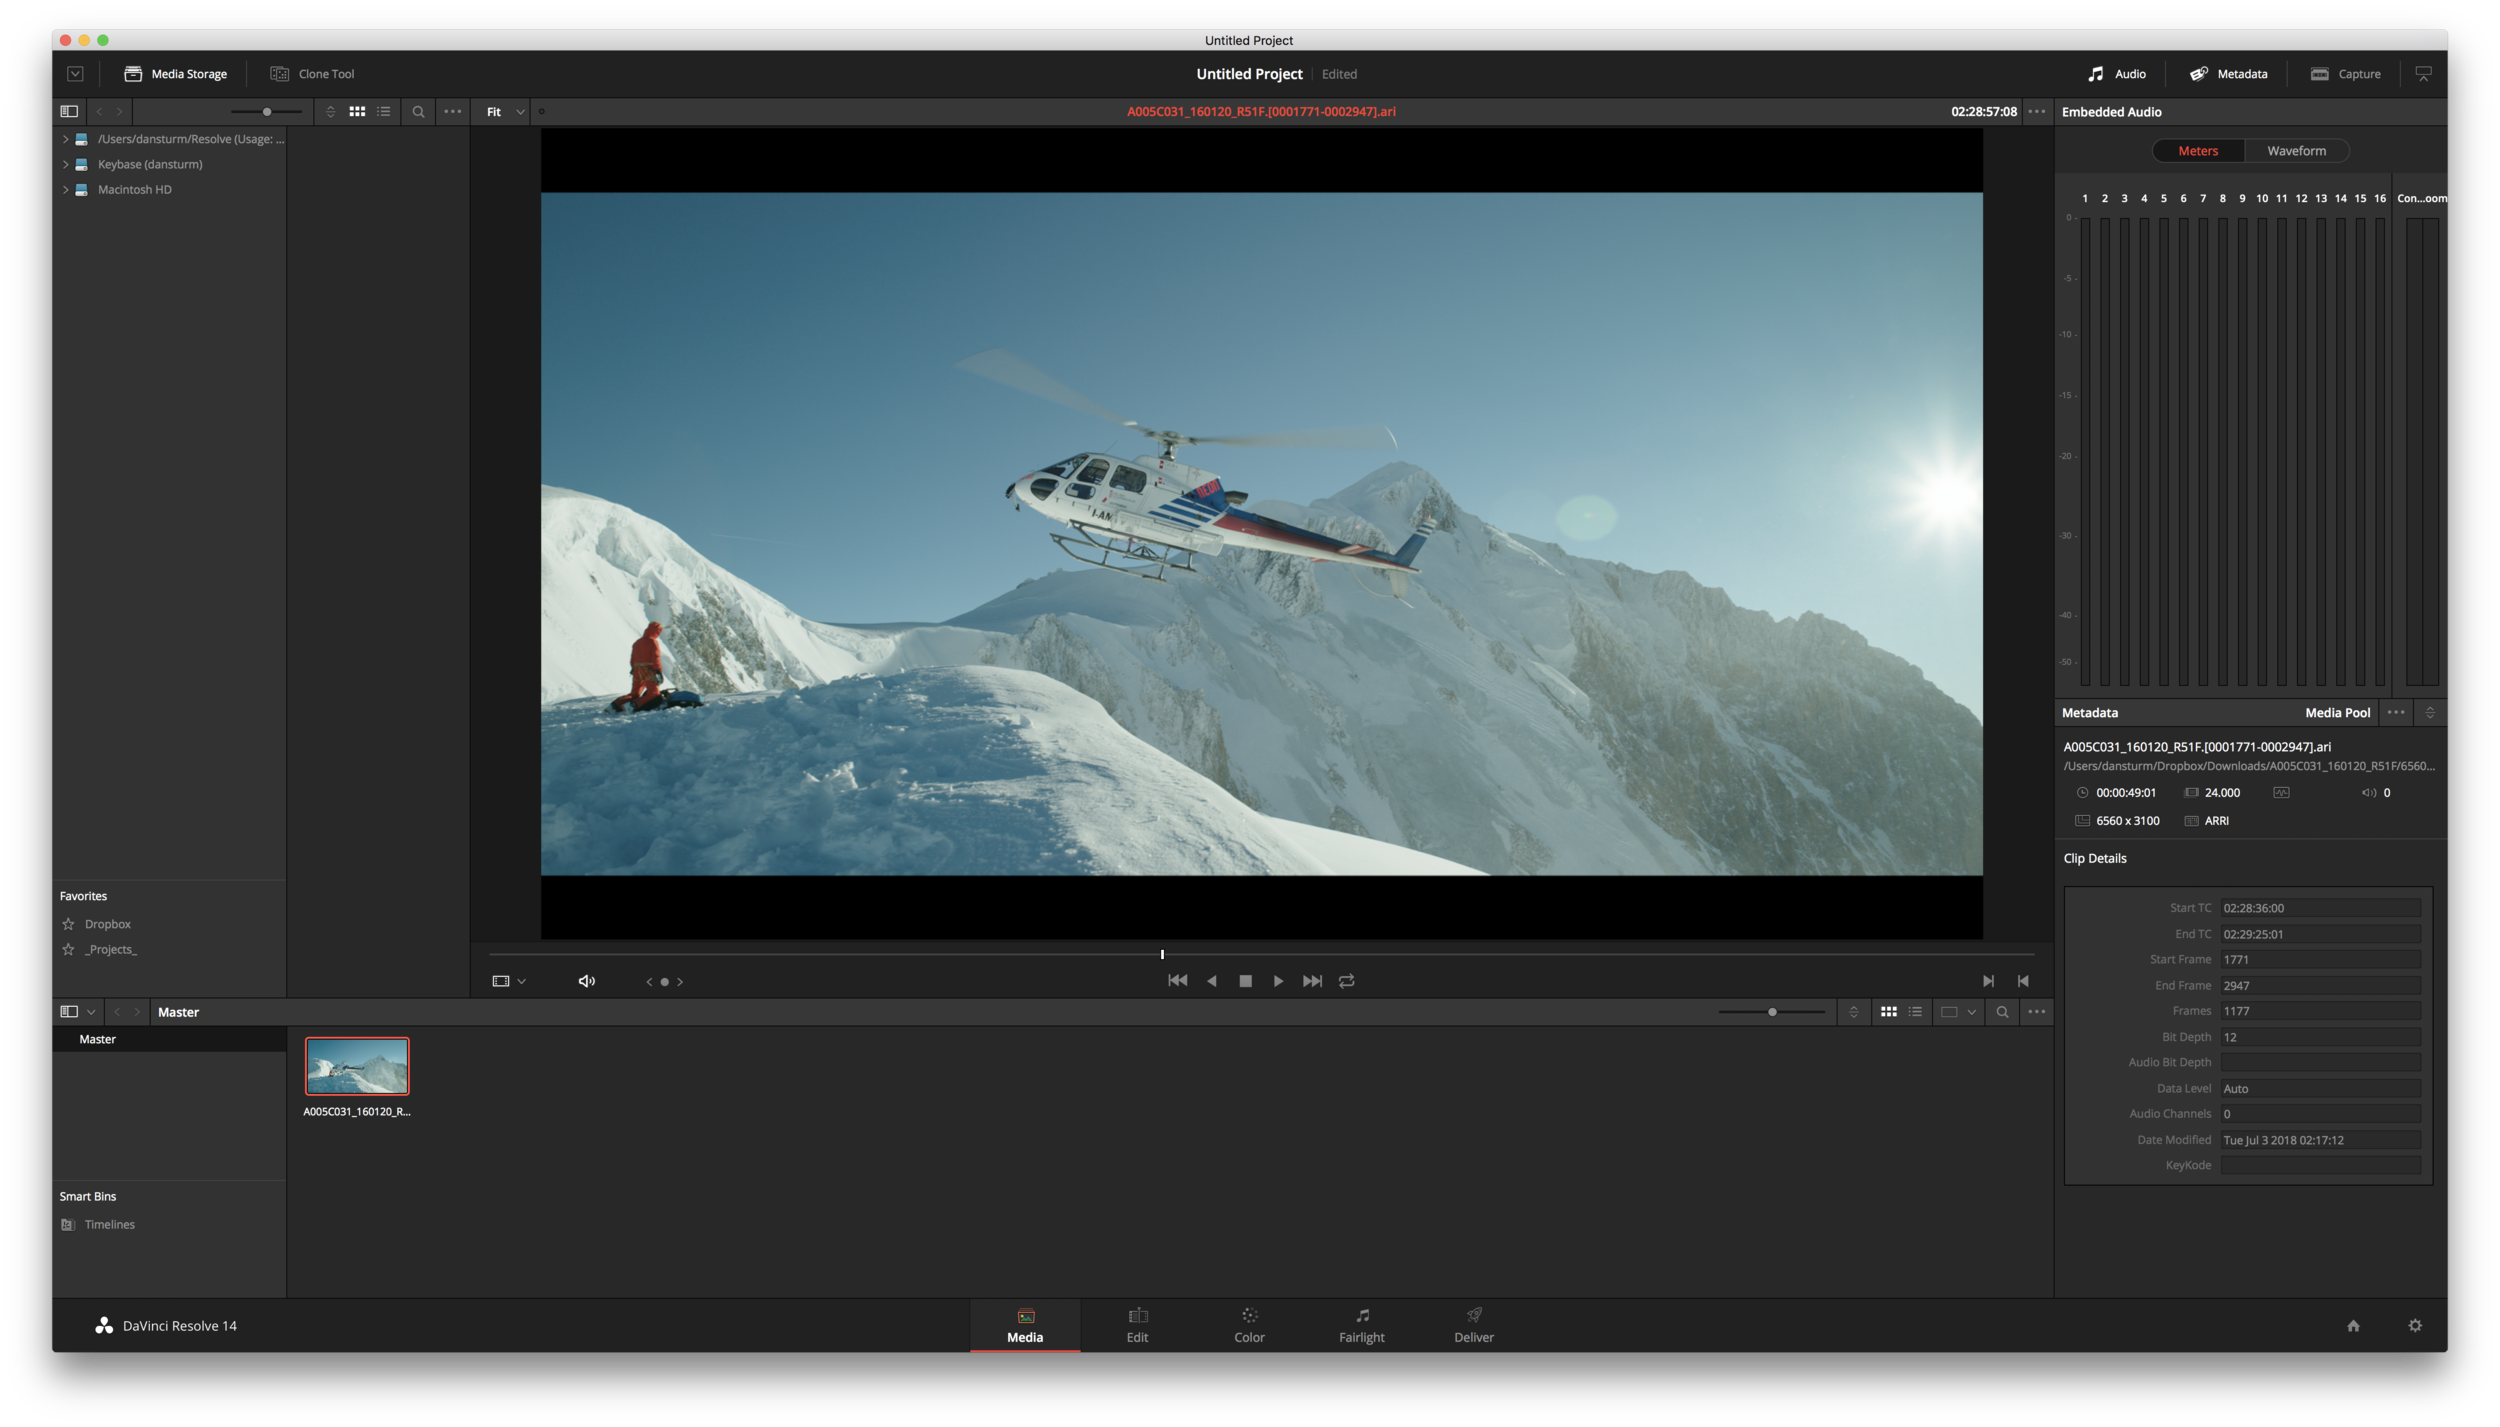
If you import that same clip into DaVinci Resolve, again, set it to Alexa colorspace and view it, you'll notice that it doesn't match the Nuke viewer. In Resolve, the footage looks "correct".
An Alexa LogC clip being viewed in Resolve with the Arri Alexa LogC to Rec709 3D LUT applied.
So, what's going on here?
The Alexa's LogC footage needs to be gamma corrected and tone-mapped to a Rec709 colorspace. In Nuke, this is a 2-step process. The footage gets its gamma linearized in the Read node before work is done, then, after our work has been added, the footage needs to be converted to Rec709 colorspace. In DaVinci Resolve, these 2 steps are performed at the same time.
The problem is that second step in Nuke. There is no built-in Viewer Input Process to properly view Alexa footage. We could toss a OCIOColorSpace node at the end of our script and work in between it and our Read. But we don't want to bake that Rec709 conversion into our render, we just want to view it in the corrected colorspace.
Adding a Custom Input Process
The first thing we're going to need is the Alexa Viewer LUT. No, this is not the same LUT that comes with the application. You can download it here, or build your own with Arri's online LUT generator.
If you only use Nuke/NukeX, adding the Input Process is relatively simple, and bares a striking resemblance to a lot of the Defaults customization we've done in the past. If, however, you also use Nuke Studio or Hiero, you'll want to ignore this section and skip ahead to the OCIOConfig version.
Nuke / NukeX
To get started, create a new Nuke project. Then:
Create a OCIOFileTransform node and add the downloaded LUT file.
Set your "working space" to "AlexaV3LogC". Leave the "direction" on "forward" and "interpolation" on "linear".
After the OCIOFileTransform node, add an OCIOColorSpace node.
Set your "in" to "linear" and your "out" to "AlexaV3LogC"
The nodes for the AlexaLUT Gizmo in Nuke.
Now we need to turn these 2 nodes into a Gizmo. To do that, select them both, hit CMD+G on the keyboard to Group them, then click the "Export Gizmo" button. Save the Gizmo in your .nuke directory. Mine is called Alexa_LUT.gizmo.
Once we've saved our Gizmo, we just need to add the following line to our Init.py file:
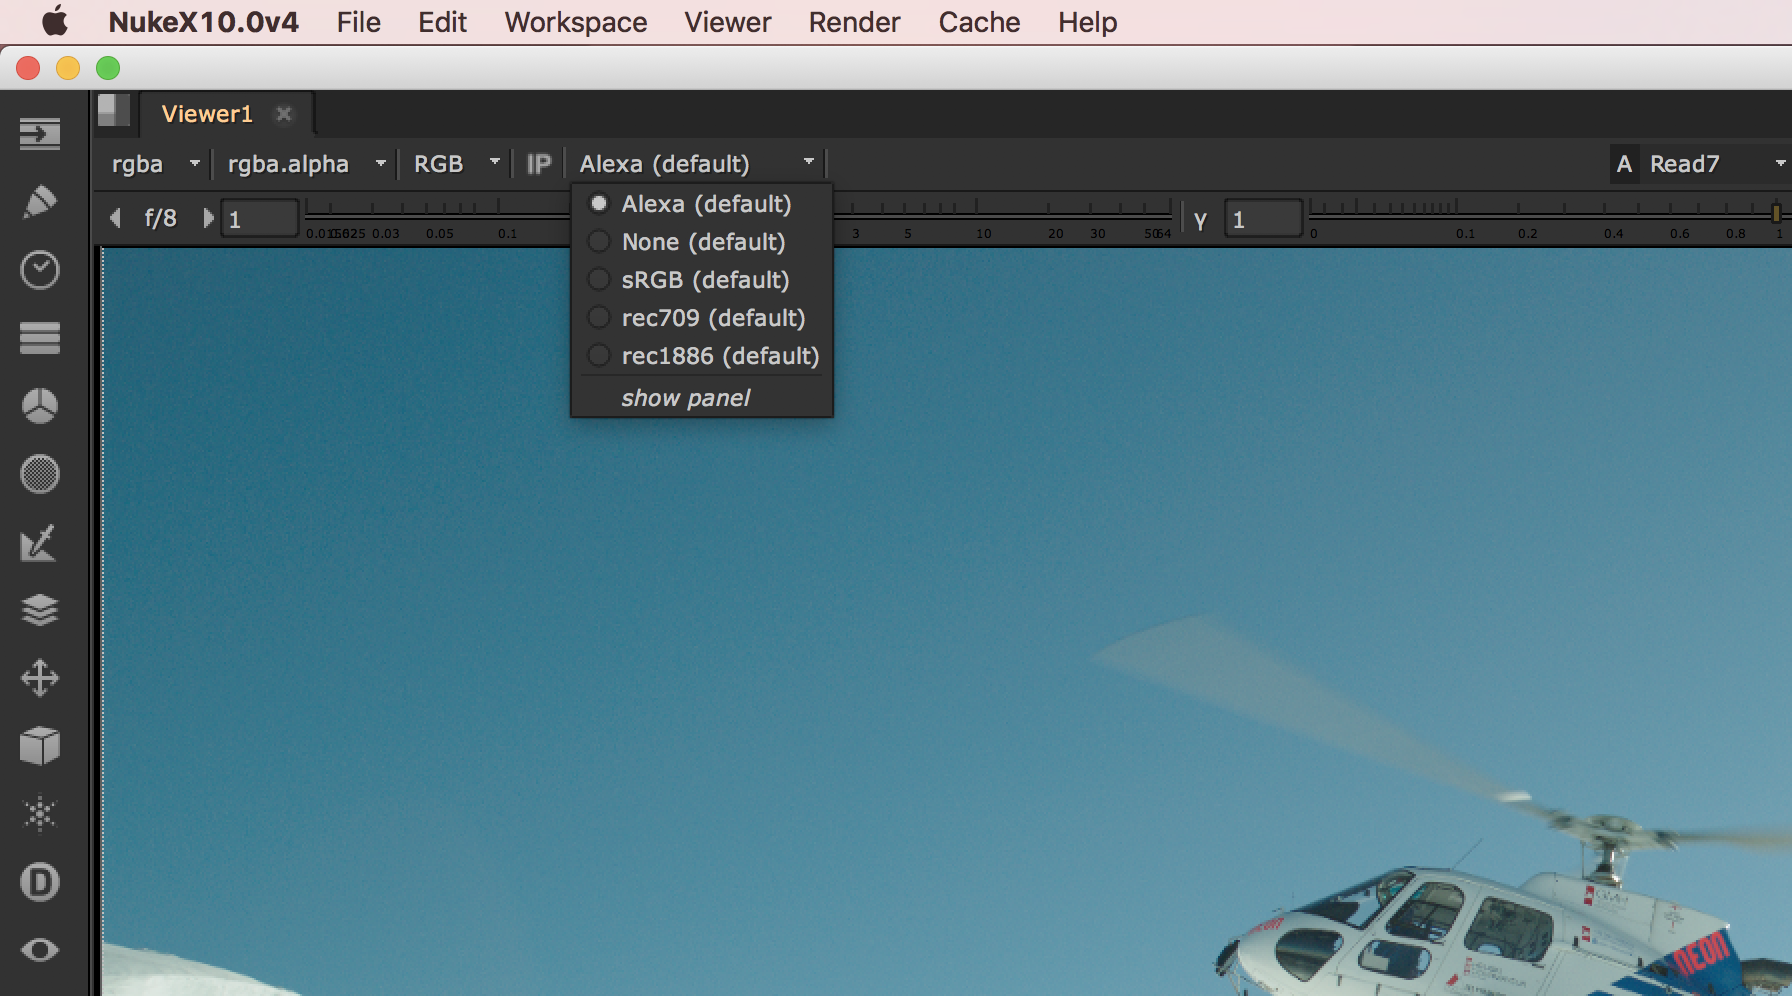
Now, when you start up Nuke, you'll have your Alexa LUT in the Input Process menu in your Viewer.
The Alexa Input Process in the Nuke Viewer.
And, just so we're clear, if we're working on an Alexa colorspace clip, as a Good VFX Artist, we're going to send back a render that is also in Alexa colorspace. That means setting the "colorspace" on our Write node to "AlexaV3LogC", regardless of the file format.
NukeStudio (and Also Nuke / NukeX)
Welcome, Nuke Studio users. For you, this process is going to be a little more work.
Just like everything in Nuke Studio, am I right?
Sorry. Let's get started.
To add our Alexa LUT to Nuke Studio, we need to create our own custom OCIOConfig. Since we're lazy (read: smart), we'll duplicate and modify the Nuke Default OCIOConfig to save us a lot of time and effort.
The OCIOConfigs that come with Nuke can be found in the app's installation directory under /plugins/OCIOConfigs/configs/. We're going to copy the folder called "nuke-default" and paste it into .nuke/OCIOConfigs/configs/ and let's rename it to something like "default-alexa".
Before we do anything else, we need to put our Alexa Viewer LUT inside the "luts" folder inside our "default-alexa" folder.
Is it there? Good.
Inside our "default-alexa" folder, is a file called "config.ocio". Open that in a text editor of your choice.
Near the top of the file, you'll see a section that looks like this:
I put mine at the top, first in the list, because I want the Alexa viewer to be my primary Input Process LUT. A good 80% of the footage I work with is Alexa footage. Your use case may vary. Rearranging these lines will have not break anything as long as you keep the indentation the same.
Now, scroll all the way down to the bottom of the file, past all the built-in colorspace configs. Add the following:
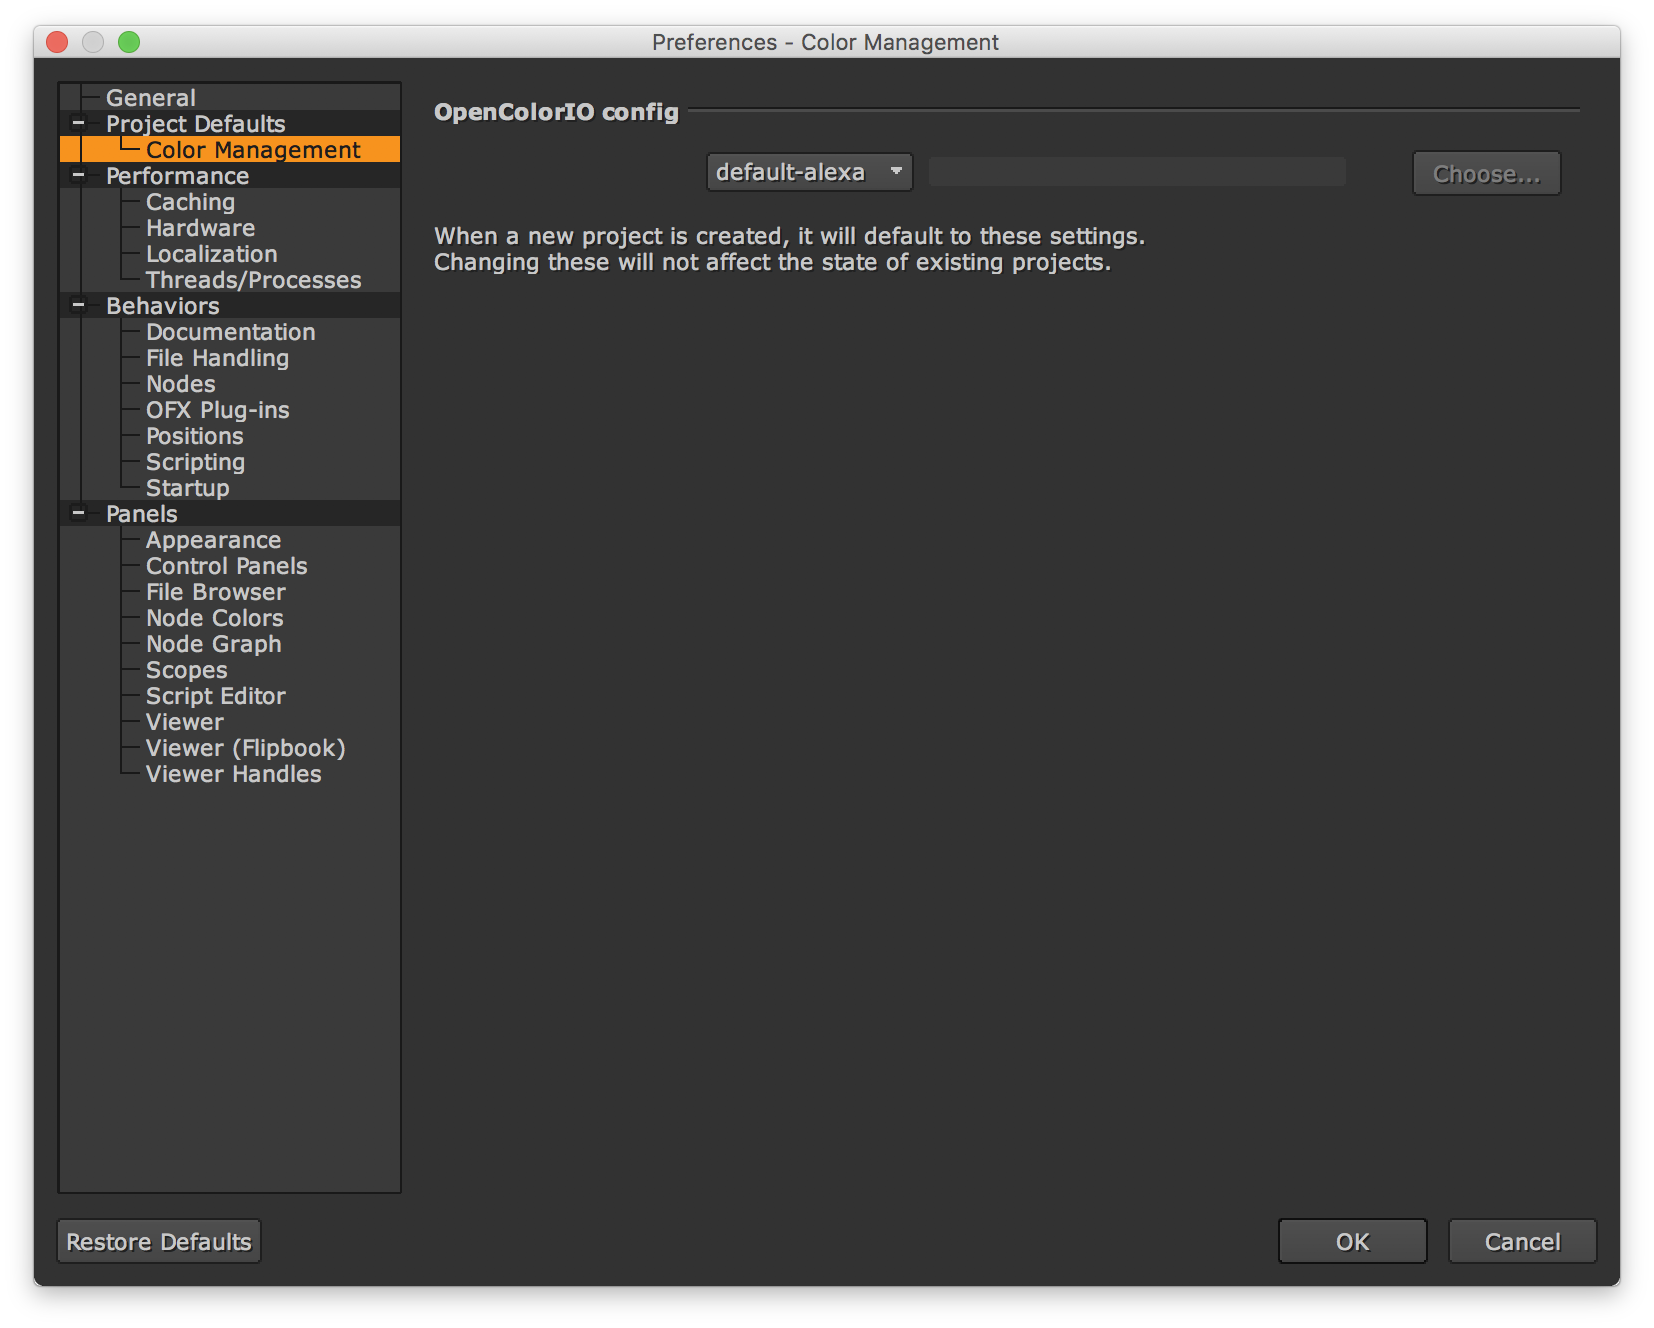
Now, all that's left to do is open Nuke and/or Nuke Studio, go to your application preferences, and under the "Color Management" section, select our new OCIOConfig file.
Choosing our custom OCIOConfig in the Nuke application preferences.
Now, you'll have your Alexa LUT in your Input Process dropdown in both Nuke and Nuke Studio and you can finally get to work.
Thanks Are in Order
I've been putting off this blog post for a very long time. Very nearly 2 years, to be specific.
I was deep into a project in Nuke Studio and was losing my mind over not being able to properly view my Alexa raw footage or Alexa-encoded renders. This project also included a large number of motion graphics, so making sure colors and white levels matched was doubly important.
So, I sent an email to Foundry support.
After about a week and a half of unsuccessful back-and-forth with my initial contact, my issue was escalated and I was contacted by Senior Customer Support Engineer Elisabeth Wetchy.
Elisabeth deserves all of the credit for solving this issue. She was possibly the most helpful customer support representative I've ever worked with.
Also, in the process of doing some research for this blog post (yeah, I do that sometimes shut up), I came across an article she wrote the day we figured this stuff out. So I guess I shouldn't feel too bad for making you guys wait 2 years for my post.
This line is also optional and, by default, will set all views to be visible and will respect the order of the views under the display. So if you wish for all LUTs to be visible, you could simply delete this line.
In my case, my active_views line says active_views: [Alexa, sRGB, sRGBf, rec709, rec1886, None] because my Alexa profile is named "Alexa", not "AlexaToRec709". I also put it at the front of the active_views list because I want it to be the default since I primarily work with Alexa LogC footage.
I’m back again with another custom tool for my Nuke setup. That can mean only one thing: I’m doing dumb stuff again.
I recently embarked on another large motion graphics project, animated entirely in Nuke. Just as with the creation of my Center Transform tool, using Nuke for such a project quickly reveals a glaring omission in the native Nuke toolset which, on this project, I just couldn't continue working without. I speak, of course, of Global Motion Blur Controls.
The Use Case
Most assets that move, especially motion graphics, need to have motion blur on them. But motion blur is incredibly processor-intensive, so, while you're working, it's almost always necessary to turn off motion blur while you animate, turning it back on to preview and render.
In Nuke, that means setting the motionblur parameter on a Transform node to 0 while you work, then setting it to 1 (or higher) to preview and render. Simple enough when you only have a handful of Transform nodes in your script. Nigh impossible to manage when you have almost 200.
The Problem
Currently, each Transform node has its own set of motion blur controls: Samples, Shutter, and Shutter Offset. There is no mechanism for modifying or enabling / disabling all motion blur parameters at the same time like there is in, say, After Effects.
Smart Nuke artists will use Cloned Transform nodes or expression link the motion blur parameters to each other. Or, take it one step further and create a custom motion blur controller with a NoOp node and expression link all Transforms to that.
While that saves some effort, you've got to add the NoOp expression to every Transform node (twice), including each new Transform you create. And, of course, there's the very likely possibility that you'll forget or miss one along the way and have to track it down once you notice your render looks wrong.
This is how I have previously dealt with this problem.
A Half-Step Forward
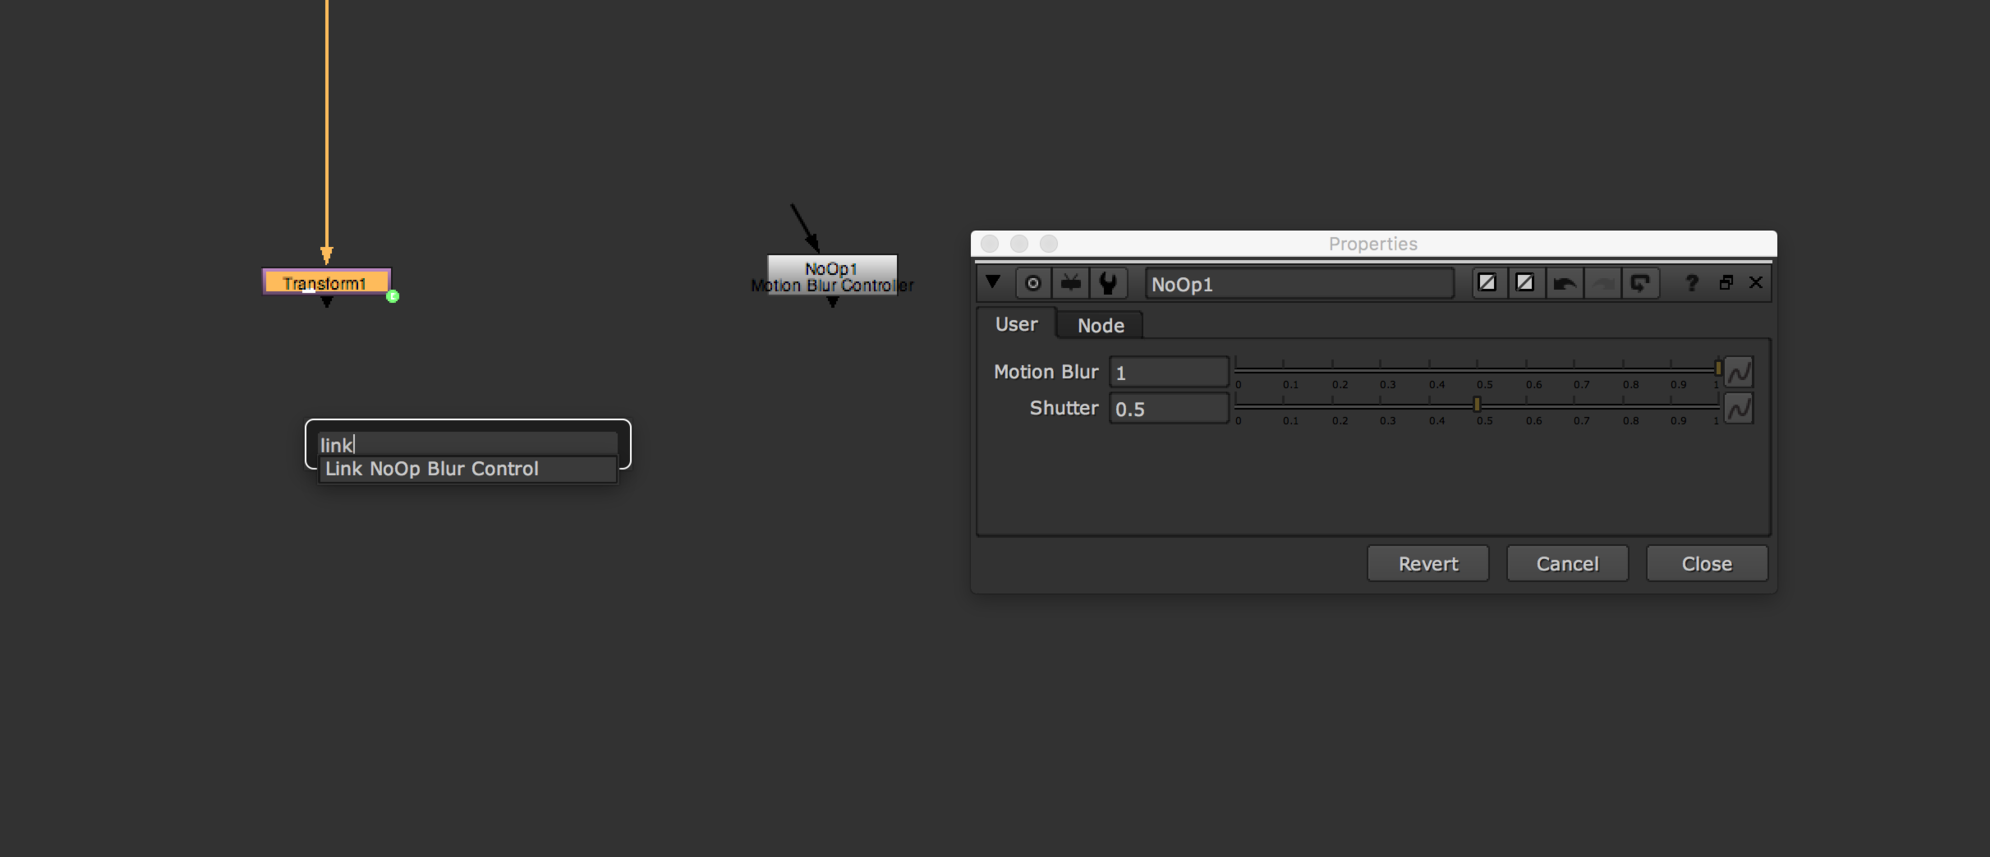
To make this process faster, I wrote a script to quickly expression link the motionblur and shutter parameters of selected nodes to my custom NoOp, which I have saved as a Toolset for easy access in each new Nuke script.
That script looks like this:
The Link to NoOp tool in Nuke
This makes the expression linking faster and easier, but I still have to select all the Transform nodes by hand before running the script. It's also incredibly fragile since I hard-coded the name of the controller node (NoOp1) into the function.
This level of half-assed automation simply won't do. We need to whole-ass a better solution.
The Solution
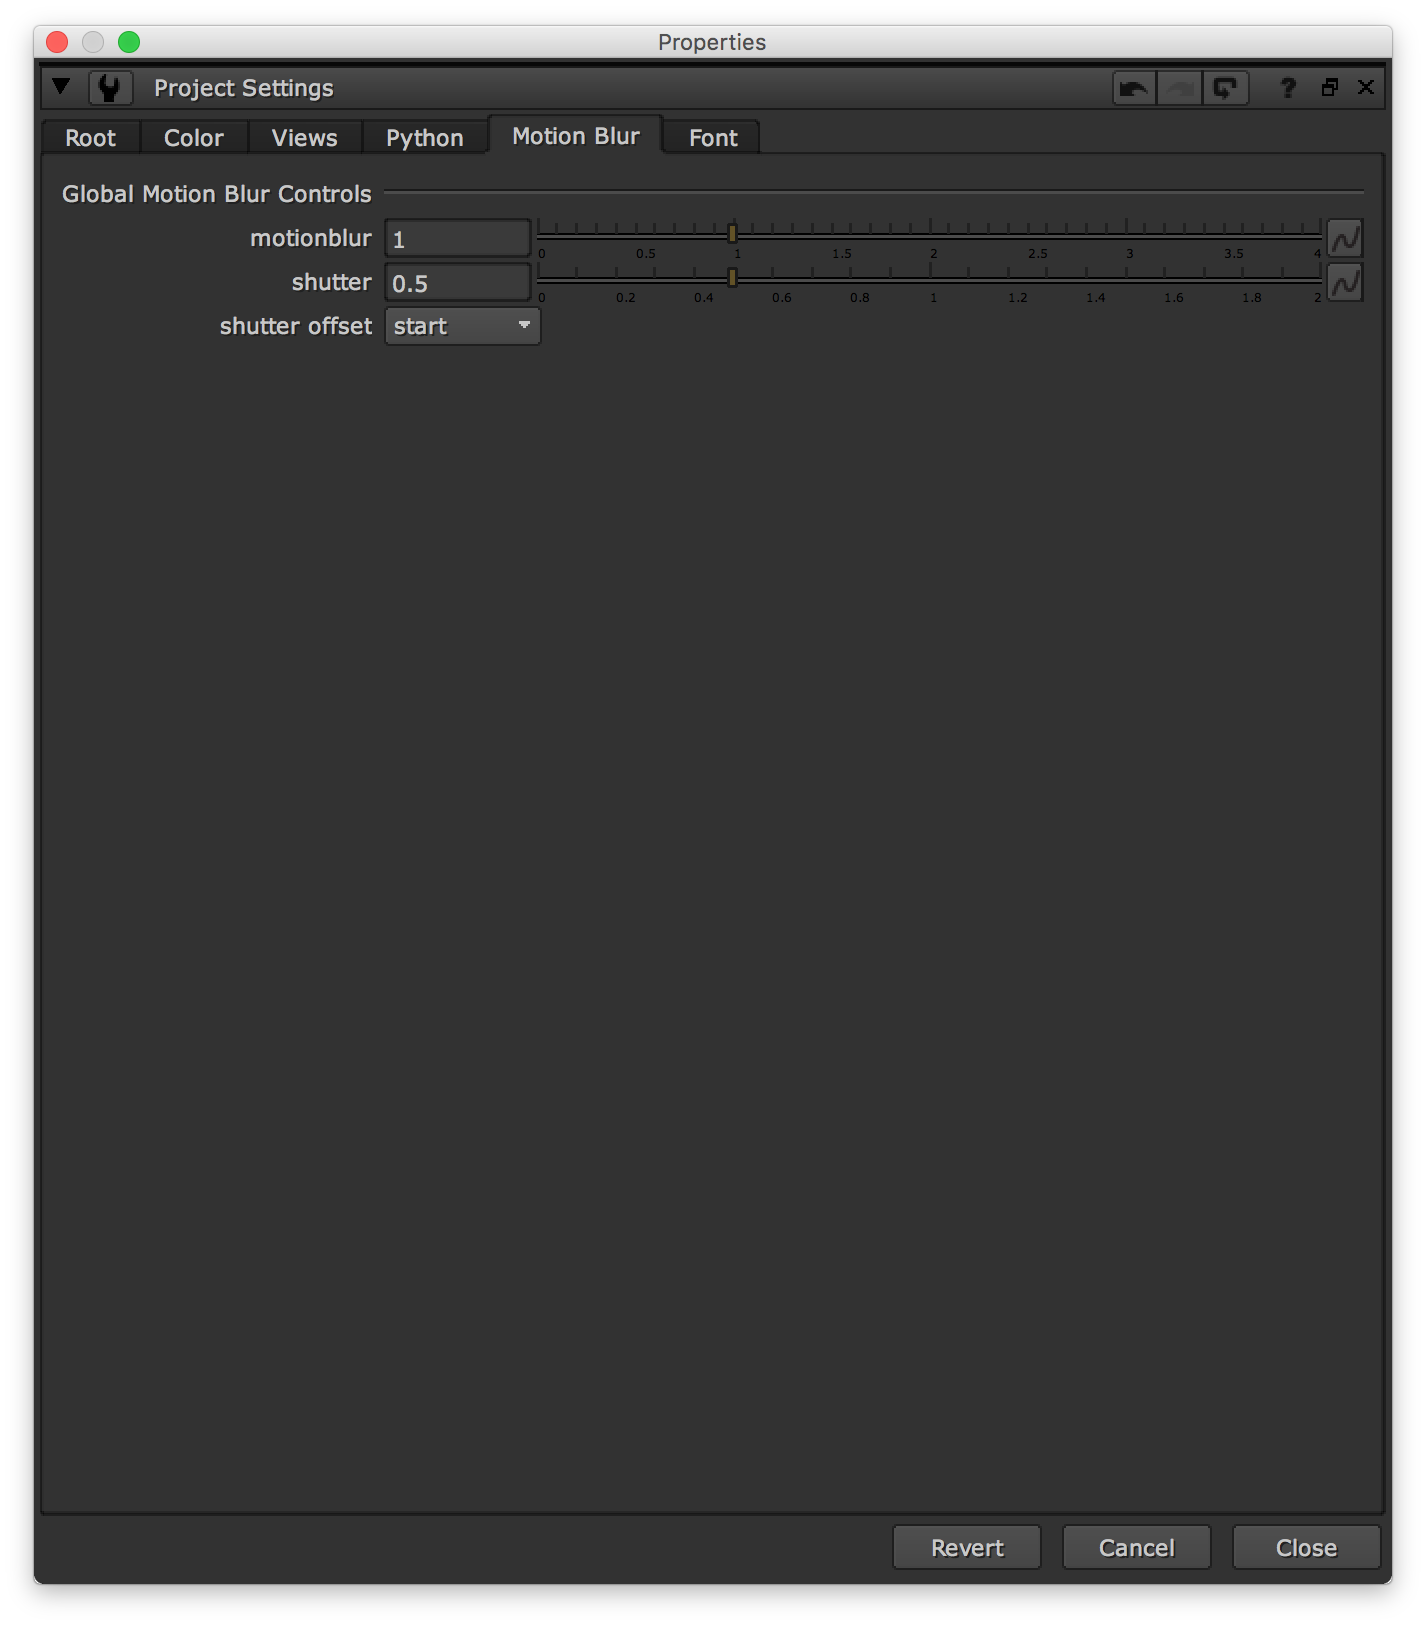
The goal would be to have motion blur settings in the Nuke script's Project Settings that control all Transform nodes by default, with the ability to override each node's individual settings, as needed.
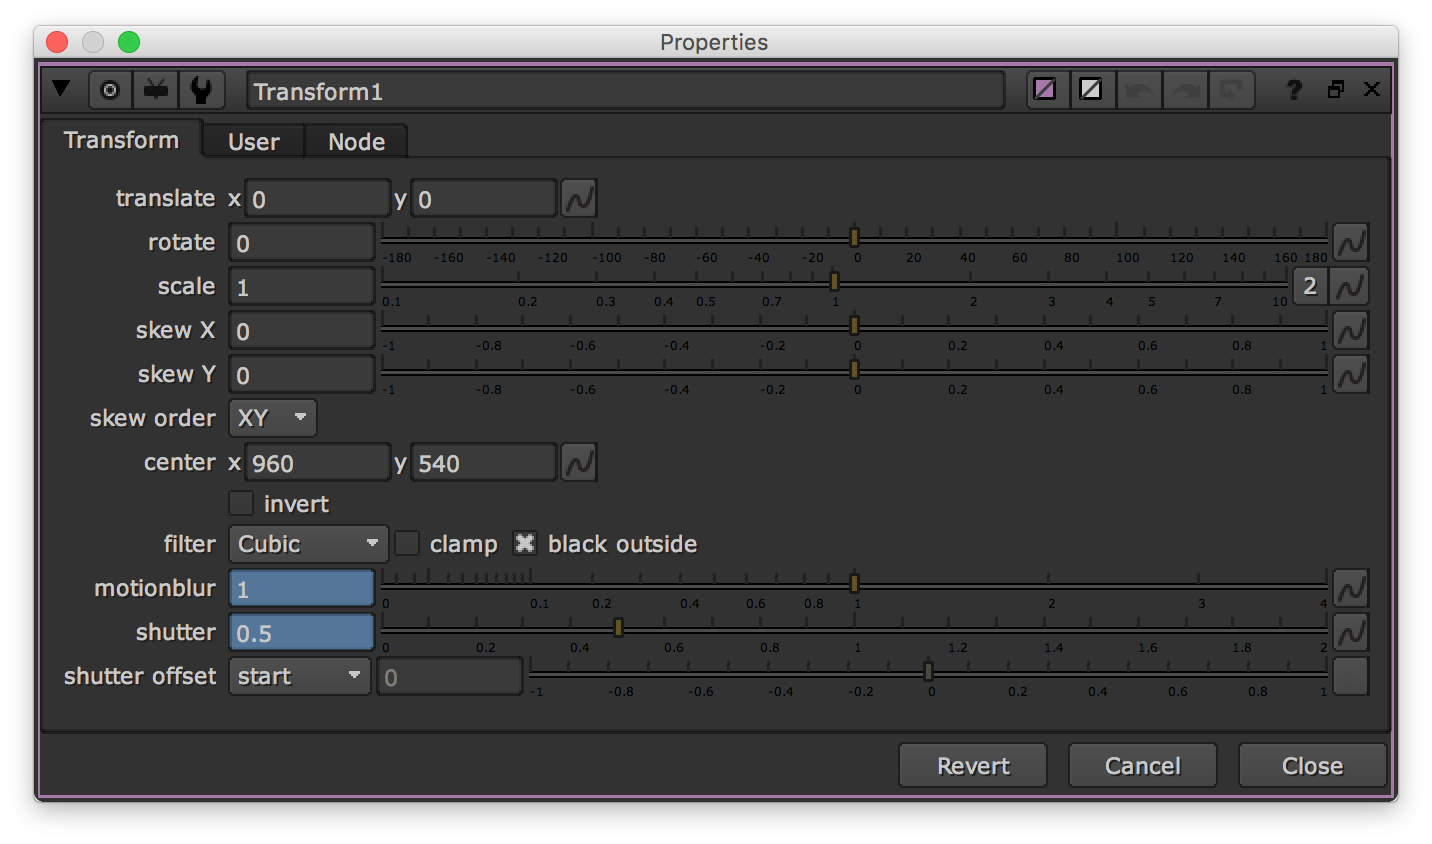
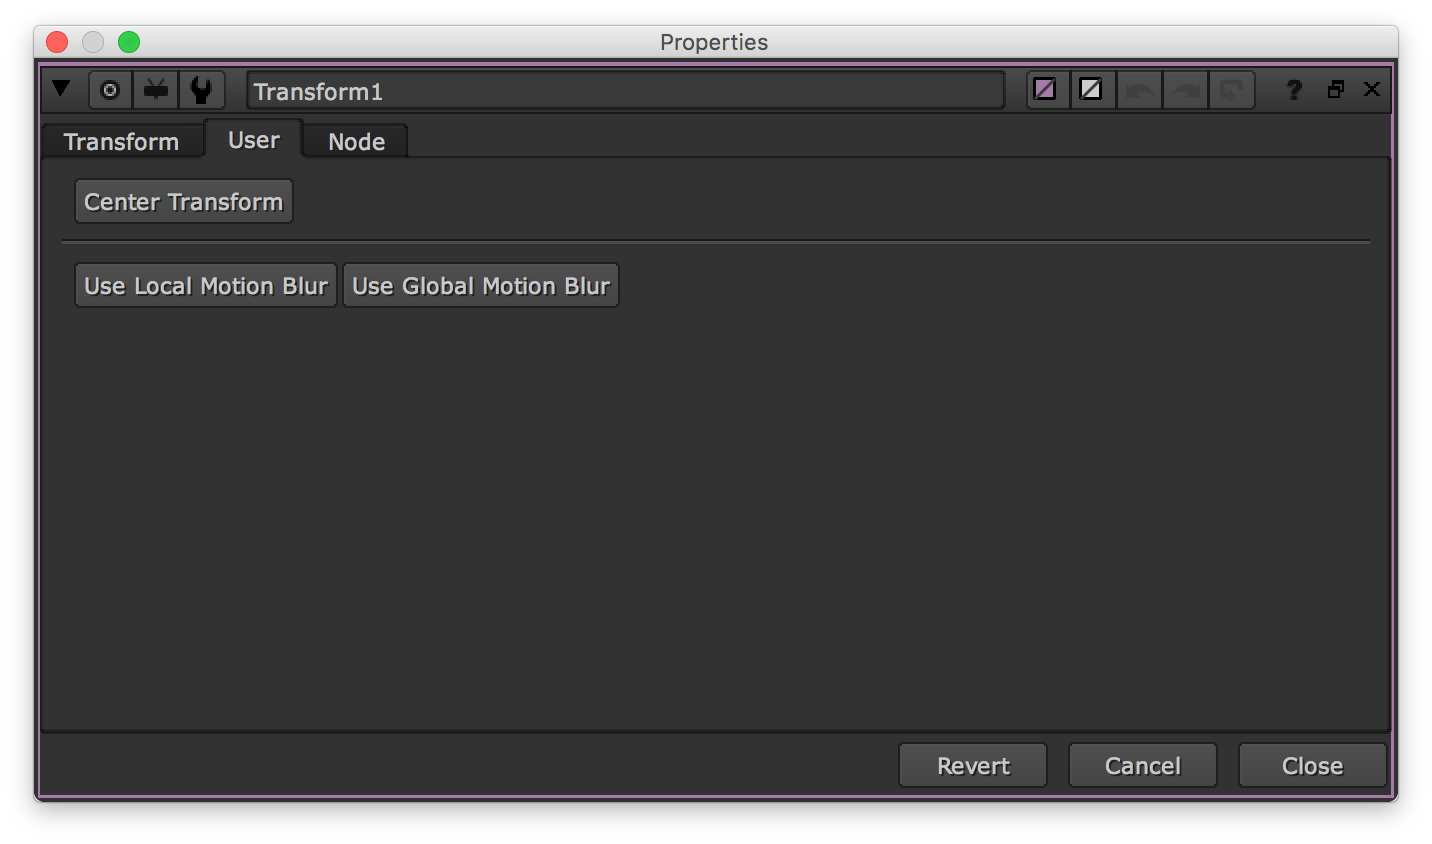
The Motion Blur tab in Project SettingsThe expression linked motion blur controlsThe unlink / re-link buttons
I’ve created global parameters for Motion Blur, Shutter, and Shutter Offset [2]. When you create a Transform node, it automatically adds 2 buttons to the User tab to make it easy to unlink / re-link to the global controller.
In my version, all Transform nodes created are linked to the global setting by default. If you'd prefer each node be un-linked by default, you can just remove the last 3 lines of the OnTransformCreate() function. Then, you can click the "Use Global Motion Blur" button on each node that you want to link.
While I haven't spent a ton of time with this new setup, I'm really happy with how it's come out. Though, as with most of my weird customizations, I look forward to the day that The Foundry adds this functionality to the app, making my code obsolete.
This is just the new code without the Center Transform button that I normally have in my OnTransformCreate() function. The function in my Menu.py file actually looks like this. ↩
I did not add the Custom Shutter Offset control to the global controller because, for one, I really don’t use that option much (or ever), and two, it turned out to be much harder to script than the rest of the options. It simply wasn’t worth the effort to figure out how to create a global controller for something I never use, and the command is still accessible by using per-node motion blur settings. ↩
If my penchant for removing incredibly specific, minor inconveniences from my life with overly-complicated, home-grown automation tools wasn't yet fully evident, get ready to be dazzled by the lengths to which I go with this one.
It's winter time here in terrible Phoenix, Arizona, and that means temperatures with highs in the high-70s to low-80s, and lows in the mid-40s. Translated: it's a bit too warm to turn on the heater, and a bit too cool to necessitate air-conditioning.
As a result, over the course of a day, the temperature inside our home ranges from 70F in the morning, to upwards of 78F by late afternoon. Since I work at home and I hate feeling hot [3], I like to keep the front and back doors to the house open in the mornings and evenings, in an effort to cool the house enough to keep the mid-day temperatures inside below 75F.
Generally, that means keeping the doors open in the morning until the temperature outside rises above 70F, and keeping them closed until the temperature drops back down below 70F in the evening.
"I don't see the problem," you say. "Just shout at Siri or your Echo Dot and ask the temperature periodically. Or just look down at your Apple Watch. Or literally any number of other options at your disposal."
Yes, I totally hear you.
Now, take a deep breath because it's going to get weird.
Most weather services use a weather station downtown or at the airport of your city. In my case, those weather stations are 25 miles away and on the other side of a very large mountain. The result being that they're almost always wrong for my neighborhood by about 3 or 4 degrees.
So, I primarily monitor the temperature with a Weather Underground station located less than a half-mile from my home. I keep the WU widget in my Today view on my phone and periodically swipe over, scroll down, and wait for it to update. I love a lot of things about Weather Underground. The speed at which its app refreshes is definitely not one of them. In fact, I usually end up launching the app from the widget in order to make sure it's actually refreshed and not showing me old data. And don't even get me started on its Apple Watch complication. It's tiny and ugly and I hate it.
Are you still reading? Okay, good.
Unrelated to the weather, I've recently begun playing around with Pushover on iOS to send myself custom push notifications based on whatever criteria I deem worthy of a notification. It's super simple to set up and use, has a ton of flexibility, and does exactly what you'd expect it to do. I love it.
I've heard of people using it to alert themselves when a long video render has completed so they can go about their day without needlessly checking the progress bar on their computer. A very cool use case that I will definitely investigate. But, on this morning, I thought to myself, how cool would it be if I could set up Pushover to send me a notification when the temperature at my local WU station goes above / drops below 70F?
To the WU
In addition to being a very cool service, Weather Underground has a nice developer API. You can sign up for a free developer account that will let you to request Current Conditions up to 500 times per day. That's more than enough for what I want to do.
It's a lot, I know. But it includes everything we would ever want to know about our hyper-local weather station. Including the current temperature, after the value labled temp_f. With a quick REGEX, we can search through this response and pull out just the current temperature in Fahrenheit.
That REGEX looks like this:
(?<="temp_f":)(.*?)(?=,)
The Push
Once we've determined our current temperature is above 70.0F, we'll send ourselves a notification with Pushover by running a command that looks like this:
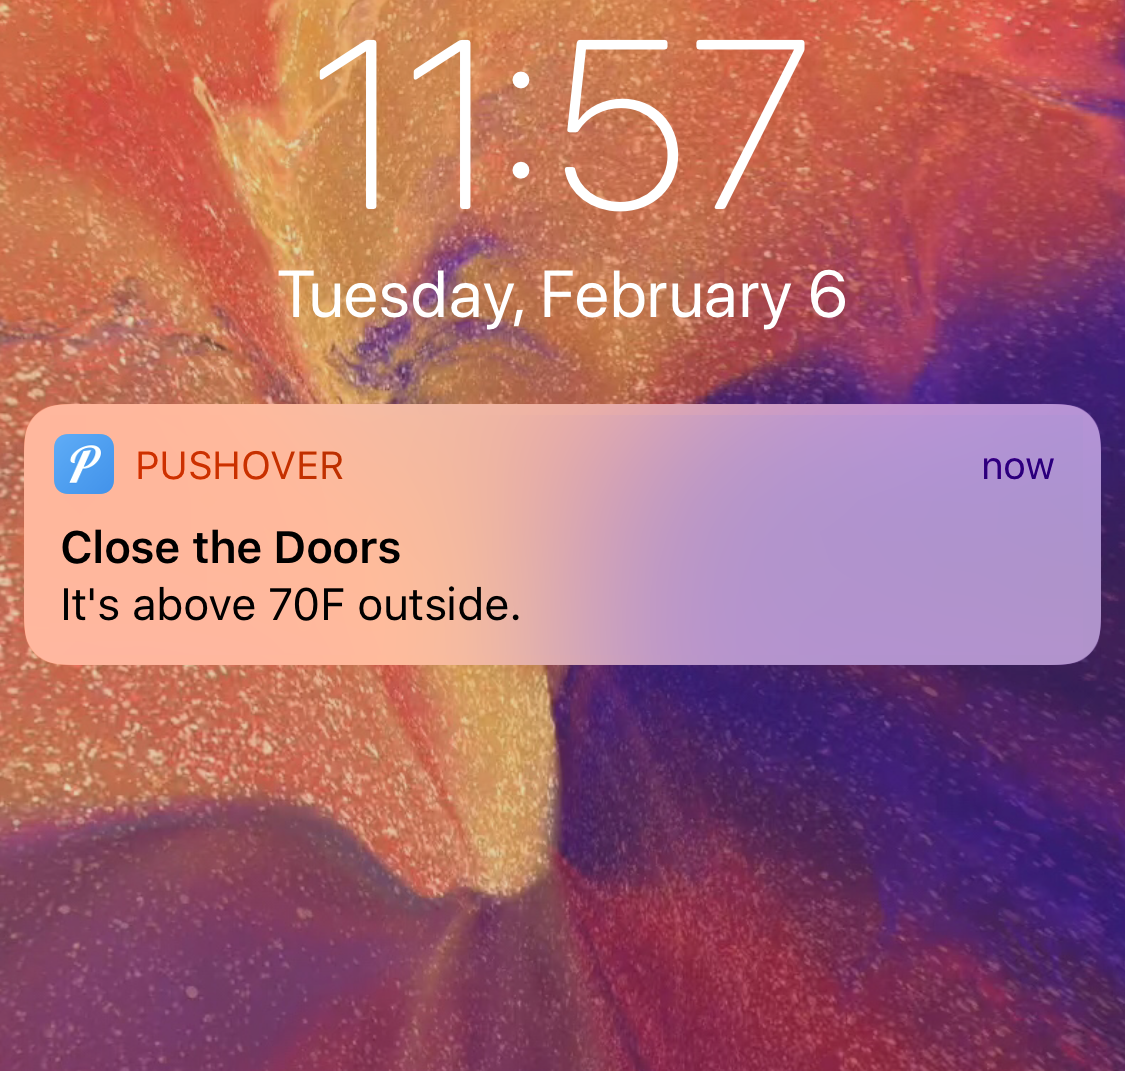
Which pops up on my iPhone and Apple Watch looking like this:
The Push Notification from Pushover
Workflow, Assemble
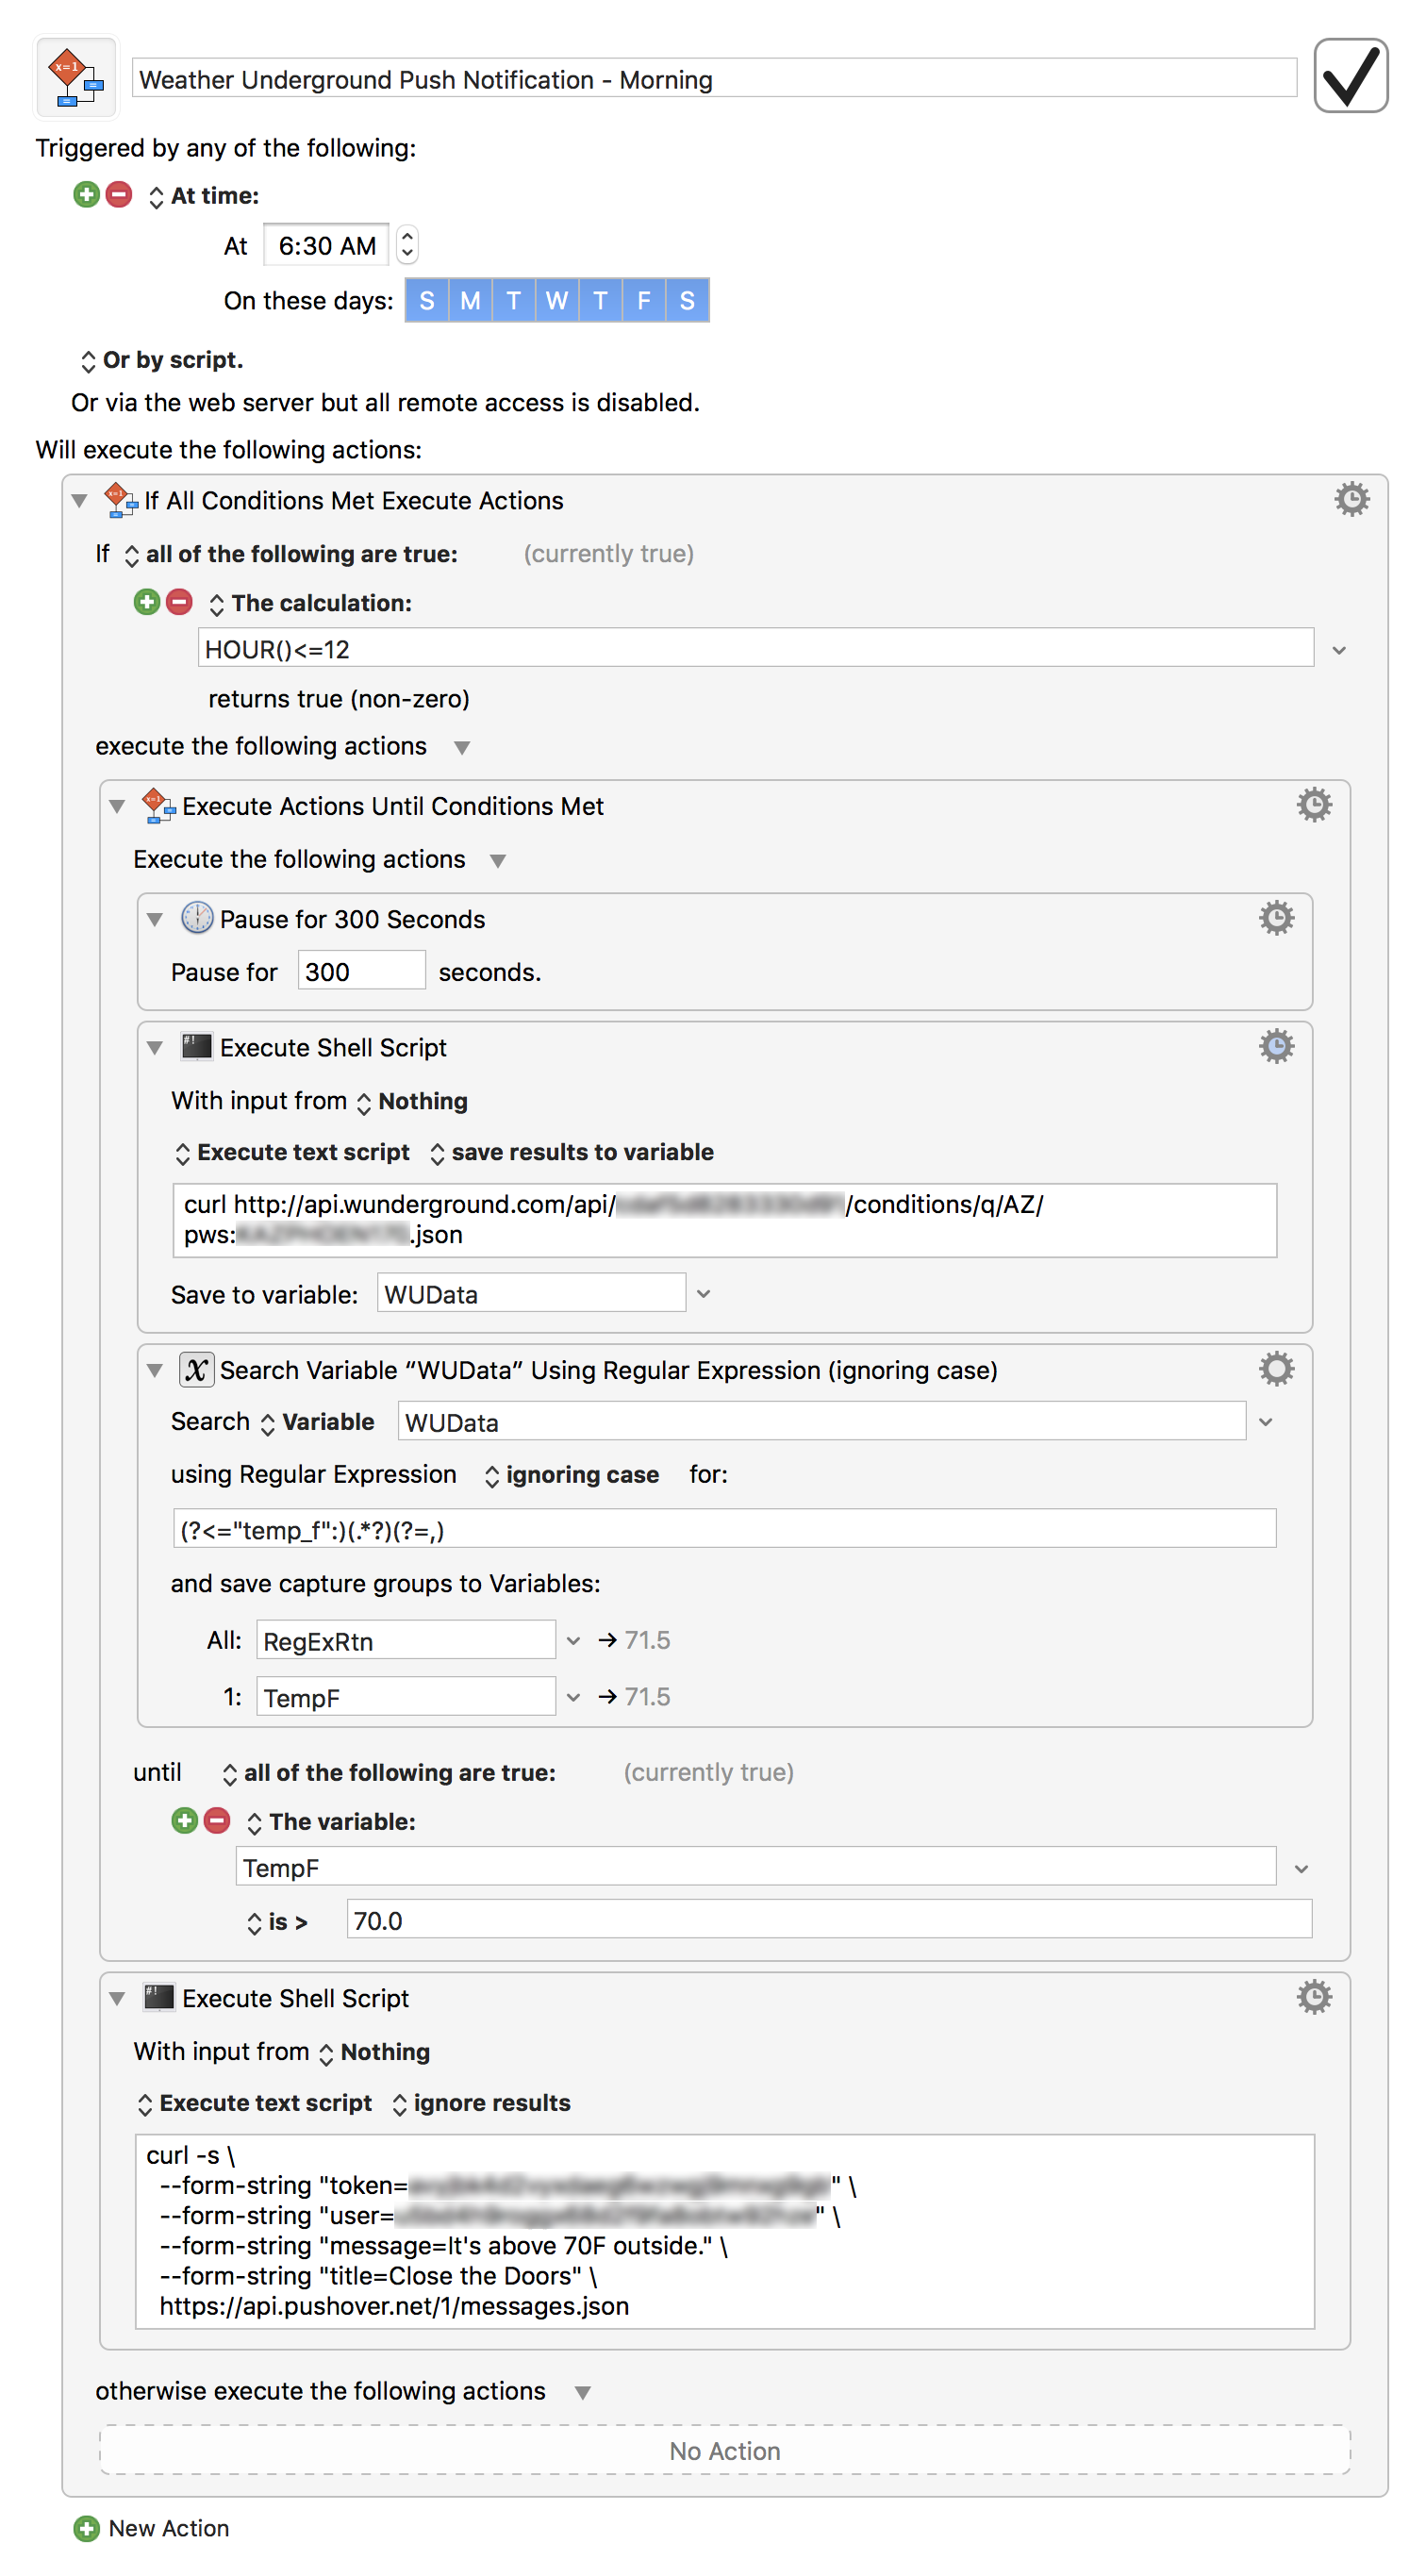
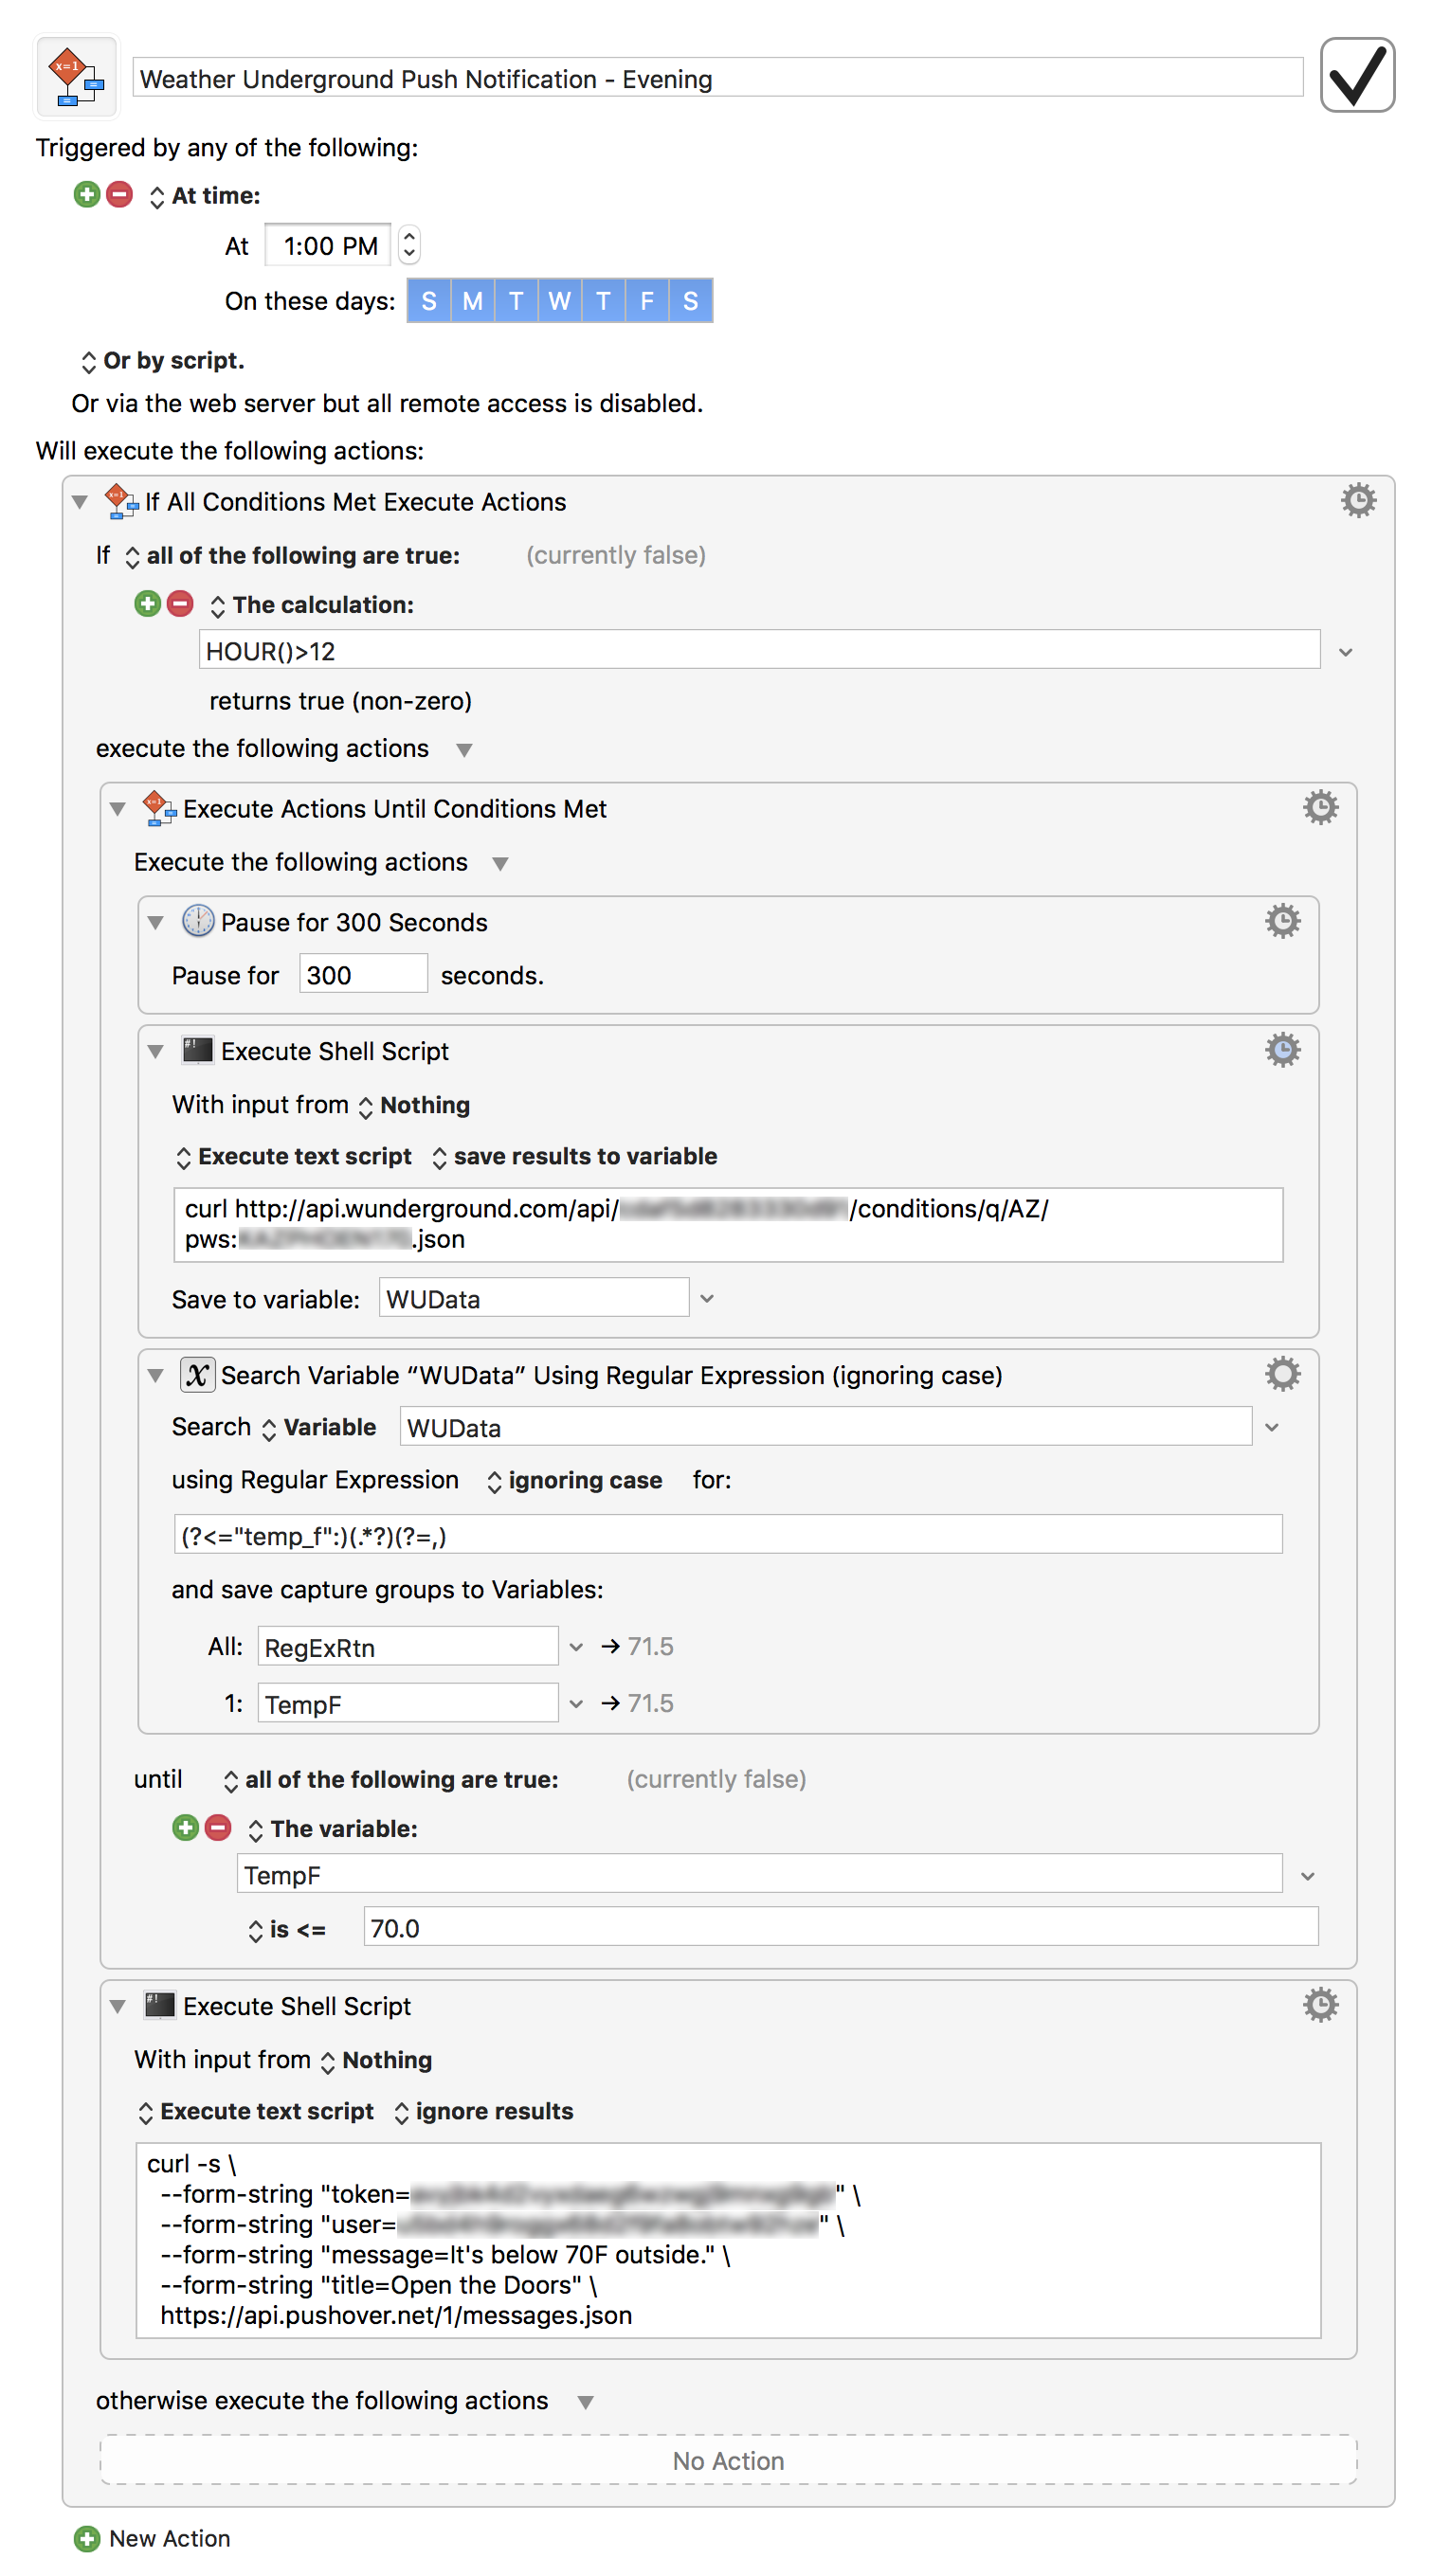
To put all these pieces together, I turn once again to my beloved Keyboard Maestro. Since I'm sending 2 push notifications over the course of the day, I set up 2 macros with different trigger criteria.
Our "Morning" macro doesn't need to start pinging the weather station at 12:01AM, and it won't need to keep checking into the afternoon, so I set it to start, every day, at 6:30AM and stop at 1:00PM. When it stops, the "Evening" macro starts. It begins checking at 1:00PM and stops at Midnight.
While running, each macro requests the current conditions from the weather station every 5 minutes (300 seconds); well under the 500 requests per day we're allowed with our free developer account. Once the temperature reaches 70.0F, the macro ends the loop, sends the push notification, and restarts the next day.
Here are both the Morning and Evening macros:
The Morning Macro in Keyboard MaestroThe Evening Macro in Keyboard Maestro
Why did you do this and why did I just read that?
Truth be told, I'll probably only get 2 or 3 months of usage from this thing each year. Soon, the temperature will be above 70F all day and night and our monthly air-conditioning bill will cost as much as an iPad.
But, until then, this tool is a delightful aide in my quest to stay cool at home, and it was a fun way to explore the Weather Underground and Pushover APIs.
Plus, I haven't posted anything to this blog in a while and I hear that's bad. So.
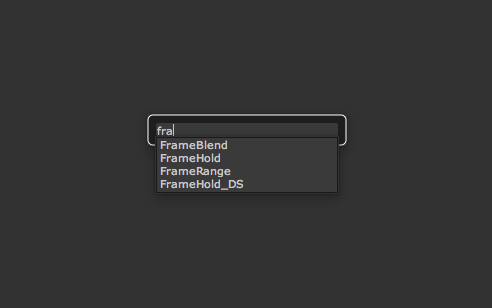
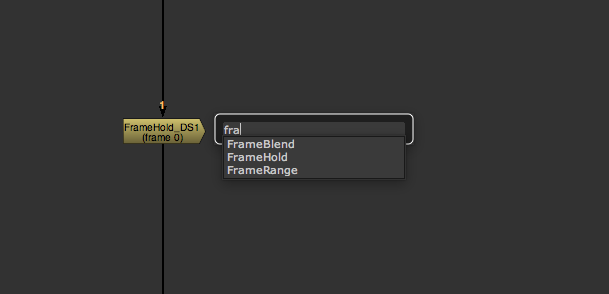
So many of the posts on this site are about creating custom gizmos to replace the native nodes inside of Nuke. But they've never completely satisfied their mission because, until now, I didn't know how to tell Nuke, "Hey, when I call a FrameHold give me my FrameHold_DS gizmo instead". So my FrameHold_DS gimzo has lived alongside the native FrameHold node since its creation. Which, by the way, is super annoying because it shows up lower in the tab-search results than the native node.
The alternative I've used — to a lesser degree of success — is to customize native nodes with the addOnUserCreate python function. While that has been effective at adding features to the native nodes, it's entirely python based and results in all my customizations being banished to a properties tab named "User". Just the sight of which makes me sad.
The good news is, I have finally figured out how to actually tell Nuke "Hey, when I call a FrameHold give me my FrameHold_DS gizmo instead". The bad news is, it's so incredibly, stupidly easy, I can't believe it took me this long to figure it out.
I was reading the Assigning a Hotkey section of the "Customizing the UI" python guide and saw this:
To assign a hotkey to an existing menu item, you effectively replace the whole menu item.
Pressing a on the keyboard now creates an Axis node.
I've known for a long time that I could add custom hotkeys to nodes, but the tab-search method was always fast enough for me that I've never wanted to do so.
But what caught my eye was the line of code. Before adding the hotkey, it defines the application's menu path to the node, then the createNode call for the node itself.
I thought to myself, there's no way I could just swap out the node name in the createNode call with the name of one of my gizmos. It couldn't possibly be that easy.
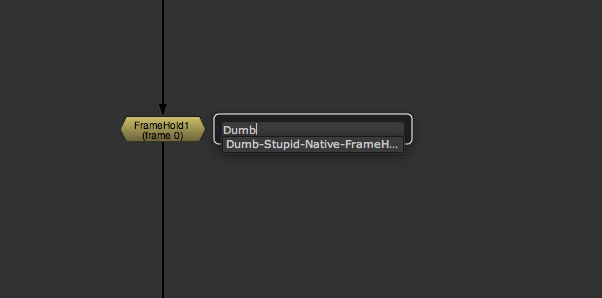
— to my Menu.py file, calling a FrameHold node will now result in my FrameHold_DS gizmo being added instead.
Now, rather than debating which half-assed method for creating custom nodes is more suited to the tool I'm trying to create, I will create custom gizmos and remap their calls using this method.
I've been wanting to do this for so long. It's a very exciting discovery for me, only slightly overshadowed by feeling like a total doofus for not figuring it out sooner.
Postscript
"But what if I want to be able to call the native node at some point, too?"
Well, I have no desire to do that, but if you do, you could always add a second line of code to rename the native node to something else, like:
As I continue to use Nuke in ways in which it was never intended to be used (read: motion graphics), I keep finding small bits of friction that I just can't help but remove with app customizations.
My latest annoyance stems from an animated project that involved more traditional motion-graphics-style animation than the typical interface design and animation I usually create. I built all the graphic assets I would need for the video ahead of time, then assembled and animated them into a sequence, entirely in Nuke.
Again and again, I would merge a new graphic asset onto my shot, and I would have to do some math to figure out how to transform it into the center of the frame. Since the origin (0,0) of a Nuke frame is the bottom left corner, by default, images show up in the lower left of the frame rather than the center. Which is not what I want.
So, I'd add a Transform to the asset and move it to the center of the 1920 x 1080 frame. Since I care about precision, I didn't just eyeball the transform. I want it to be exact.
As long as I add a Transform to a graphic element with the upstream node selected, the Transform will detect the width and height of the asset and place the transform jack in the center of the object. As a Nuke user, you already knew that.
Then, I place my cursor in the x translate parameter box and type 1920/2 - whatever value was in the x center position, as determined by the upstream node. I repeat this process for the y translate parameter, using 1080/2 to match the frame's height.
And lo, we have discovered another simple, math-based operation, prone to human error, ripe for automation. The formula is simple:
The x translate parameter should be defined as half the frame width minus half the asset width.
The y translate parameter should be defined as half the frame height minus half the asset height.
If we have added the Translate node directly to the asset — which is to say we have not added it to our script unconnected — the x center and y center parameters will be automatically filled with the half-width and half-height values of our asset.
In Nuke Python, this formula would be expressed as:
n = nuke.thisNode()
Get the x and y values of the Transform’s center point
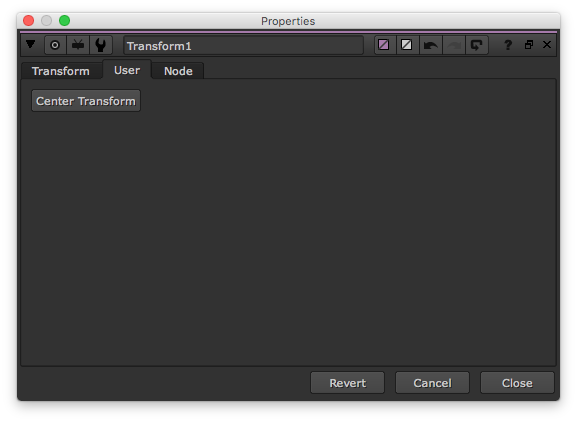
Now, every Transform node created will have a nice big "Center Transform" button added to it automatically.
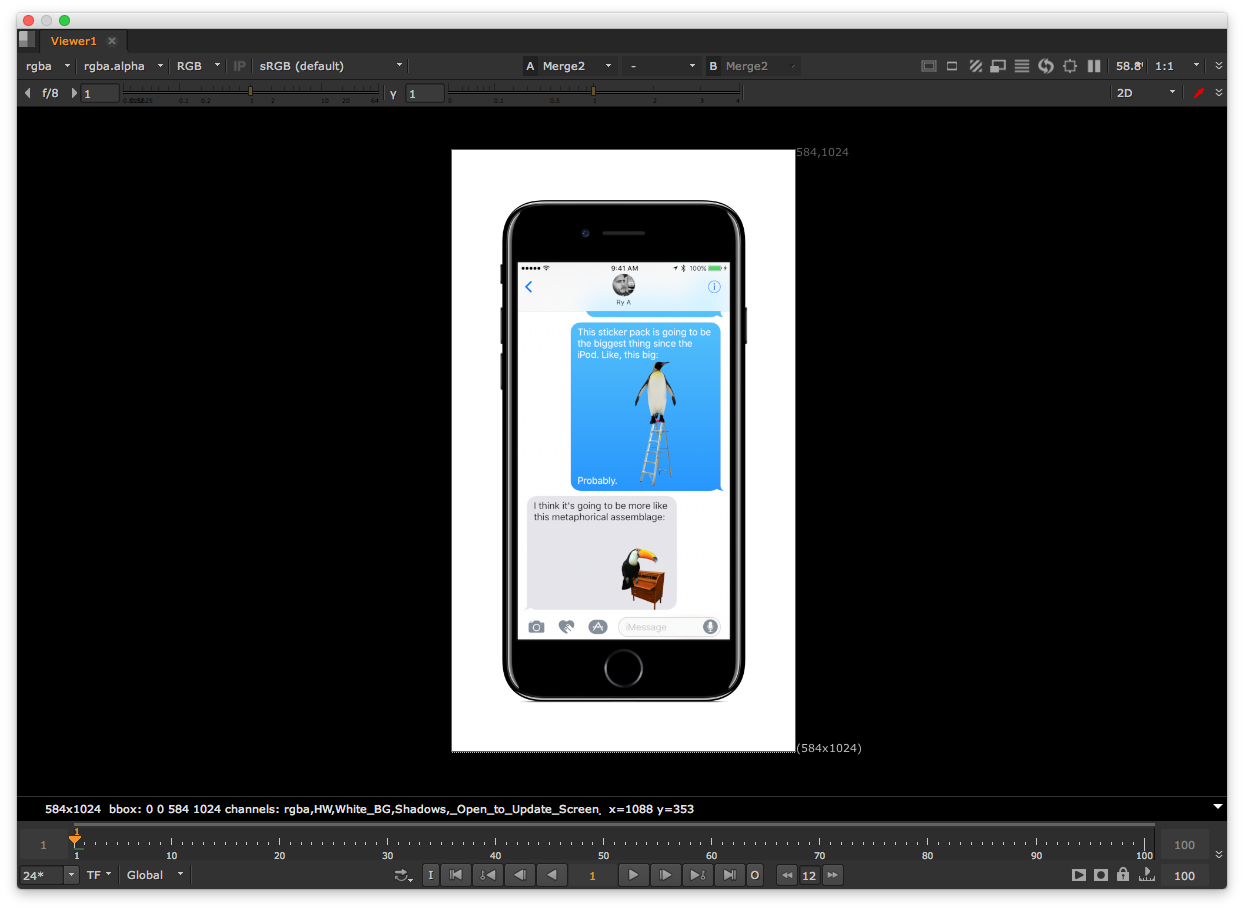
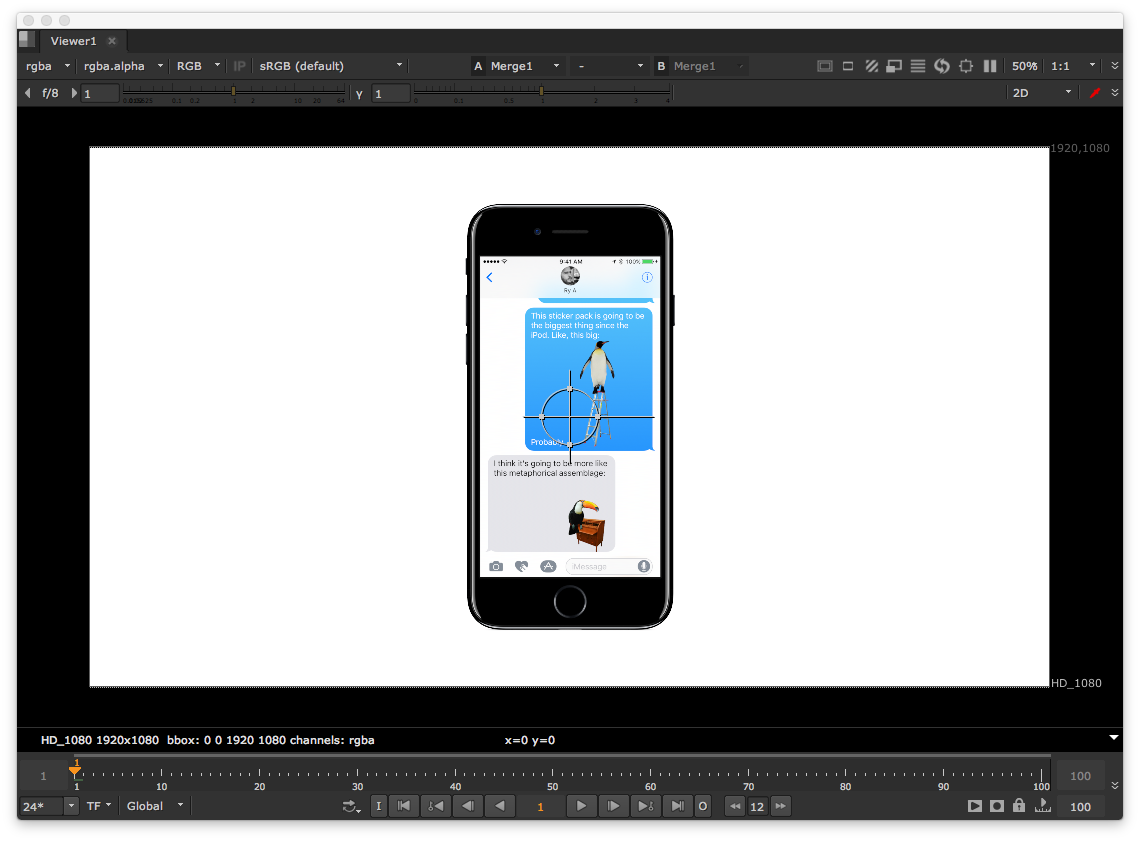
So, when I bring in a 584 x 1024 graphic asset like, say, this:
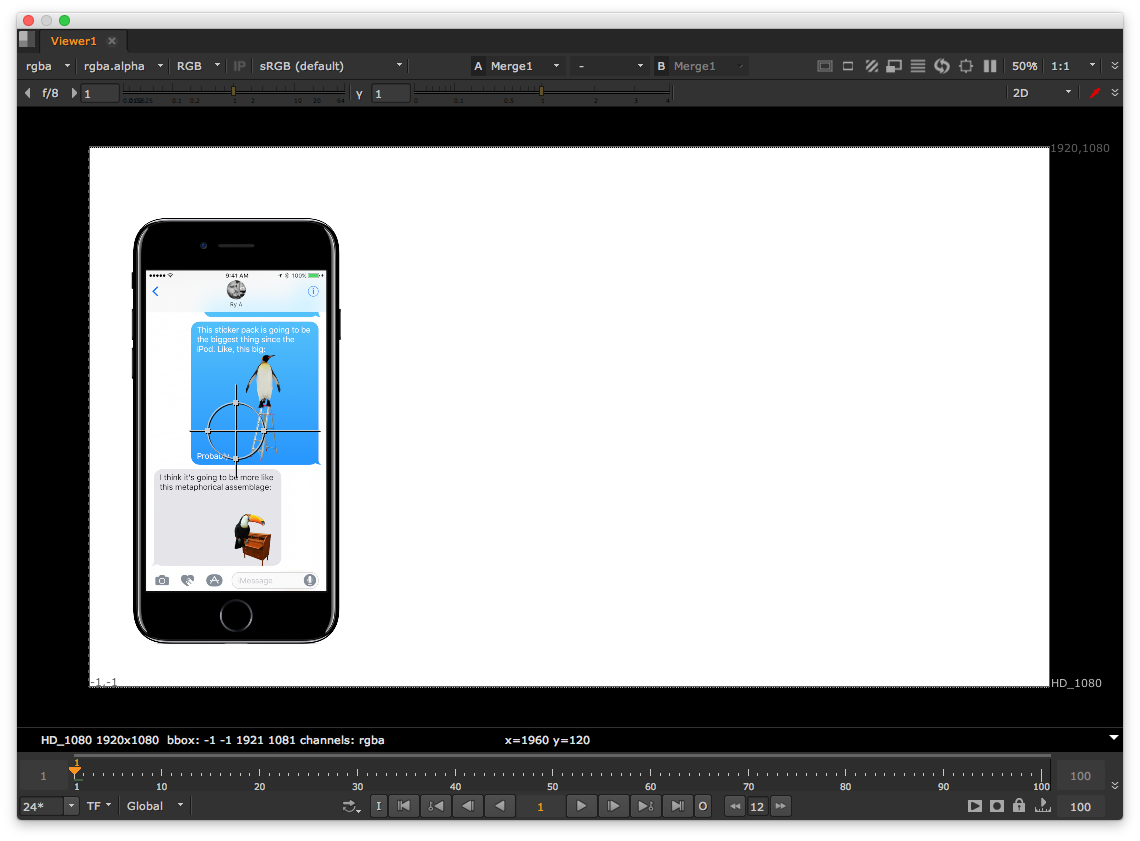
And I merge it over a 1920 x 1080 background...
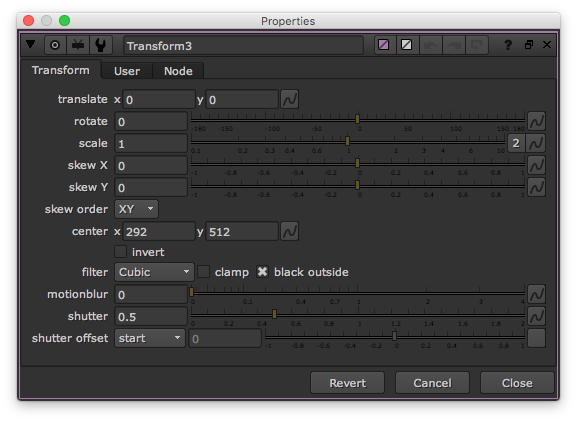
...add a Transform node — which will find the center point to be (292,512)
All I have to do to center my graphic asset is click this button...
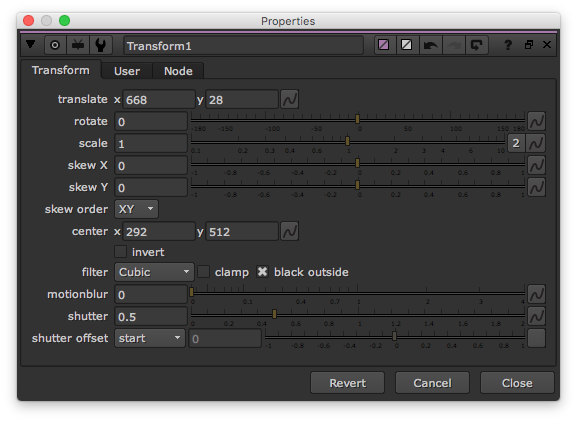
...and boom. Automated.
Update – 2020-04-20
Back in January, reader Birger sent me an email explaining his method for centering non-root-sized images over a background.
He writes:
For me, the easiest way would be to put a reformat (1920x1080) underneath the asset and set resize type to none. Would that work for you too?
As I replied to Birger, this will definitely accomplish the same thing once you tick the "black outside" checkbox. Additionally, the Reformat node concatenates just like the Transform node, so if you need to stack transforms, you wont lose any quality due to filtering.
The only arguments I can make for using my version over a Reformat node are:
I like to see a Transform node on the node graph when I'm repositioning things because it helps me understand what's happening at a glance.
When I'm working, I often put down a Transform node before I know I need something centered, so it's easier for me to just click the "Center" button.
In the event that I want to start with a centered image and then move it slightly off-center, I can use the same node, center the object, then move from there. But I probably wouldn't do that since I can add an additional Transform after the Center operation and the nodes would concatenate into a single Transform operation, so this one isn't really valid.
Anyway, thanks Birger for the additional solution!.
The best thing about posting my amateur, hacky Nuke scripts on this blog is that you, the handsome readers of this site, are often much smarter than I am, and frequently write in with enhancements or improvements to my scripts.
def set_viewer_handles(head_handles, tail_handles):
#from https://doingthatwrong.com/
# set in and out points of viewer to script range minus handle frames
# Get the node that is the current viewer
v = nuke.activeViewer().node()
# Get the first and last frames from the project settings
firstFrame = nuke.Root()['first_frame'].value()
lastFrame = nuke.Root()['last_frame'].value()
# get a string for the new range and set this on the viewer
newRange = str(int(firstFrame)+head_handles) + '-' + str(int(lastFrame) - tail_handles)
v['frame_range_lock'].setValue(True)
v['frame_range'].setValue(newRange)
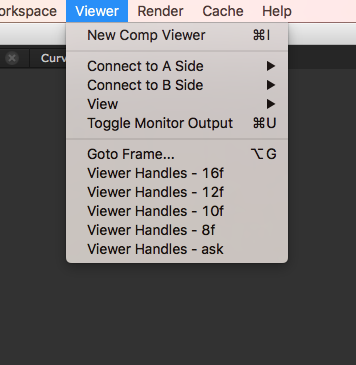
In my original script, I had hard-coded the frame handle length into the function, and created duplicate functions for each of my different handle lengths. Sean, being much better at this than I am, created a single function that takes a handle length input from the function call. In his version, all that’s required to add an alternative frame handle length to the menu options is to duplicate the line that adds the menu command, and change the handle length that’s sent to the function. Sean also added the ability to set different head and tail handle lengths to the script.
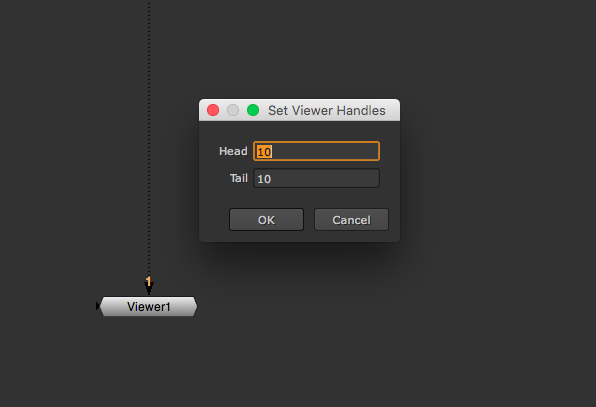
In thanking Sean for sending me this improved version of the script, I mentioned that it seemed that he'd set up the function in a way that would make it easy to prompt users to input a handle length, should they require a custom handle that wasn't already in their menu options. To which he replied with this:
def set_viewer_range(head_handles= 10, tail_handles= 10, ask= False):
# set in and out points of viewer to script range minus handle frames
# from https://doingthatwrong.com/
# with some tweaks by Sean Danischevsky 2017
if ask:
p= nuke.Panel('Set Viewer Handles')
p.addSingleLineInput('Head', head_handles)
p.addSingleLineInput('Tail', tail_handles)
#show the panel
ret = p.show()
if ret:
head_handles= p.value('Head')
tail_handles= p.value('Tail')
else:
return
#only positive integers, pleasehead_handles= max(0, int(head_handles))tail_handles= max(0, int(tail_handles))# Get the node that is the current viewerv = nuke.activeViewer().node()# Get the first and last frames from the project settingsfirstFrame = nuke.Root()['first_frame'].value()lastFrame = nuke.Root()['last_frame'].value()# get a string for the new range and set this on the viewernewRange = str(int(firstFrame)+ head_handles) + '-' + str(int(lastFrame) - tail_handles)v['frame_range_lock'].setValue(True)v['frame_range'].setValue(newRange)
Now, in addition to the set, common handle lengths in the menu, there’s now an option to prompt the user for input. The pop-up is pre-filled with a value of 10, something that can be customized, as well. It’s a thing of beauty.
I'd like to thank Sean for sending me both of these scripts. He took my ugly, half-formed idea, simplified it and made it more flexible. I've already begun using his script in place of mine, and I suggest you do the same.
I recently made some small updates to 3 of my Nuke Gizmos. None of them really warrant an entire blog post, so we'll call this post more of a "changelog".
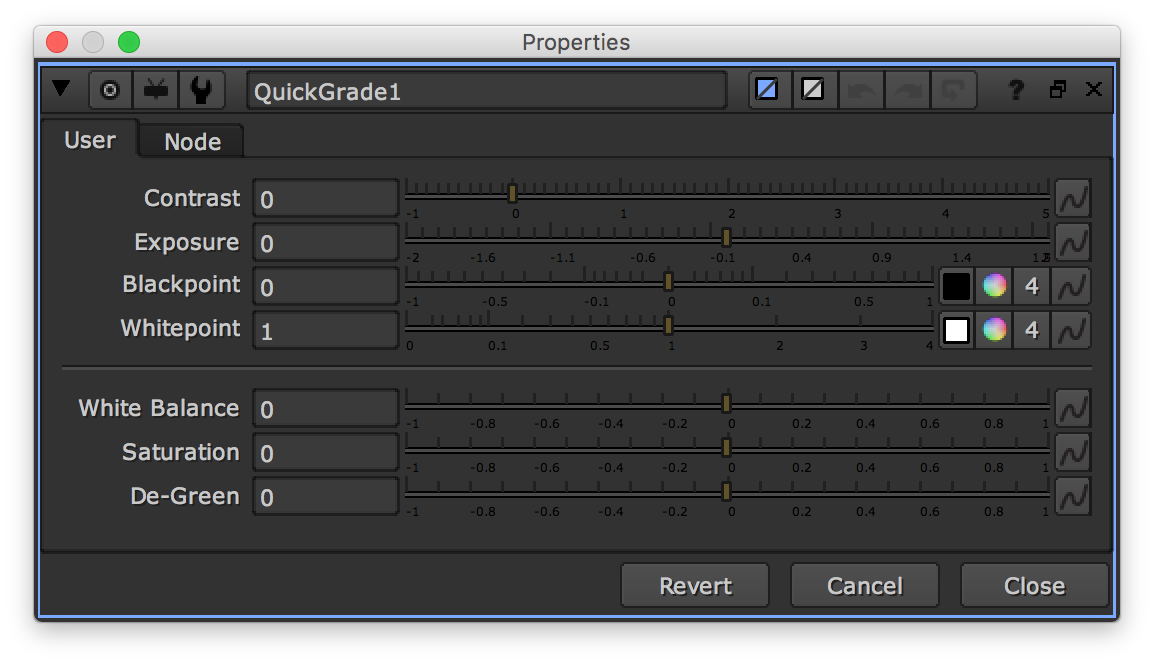
QuickGrade
I made the QuickGrade Gizmo to be a fast, lightweight color correction tool for making common adjustments to a wide variety of clips. It's pretty great at doing just that, with one exception.
One of the most common "image balancing" adjustments is remapping the black and white points of a clip; usually with a Grade node. In the Grade node, one typically uses the Eyedropper to select the brightest and darkest pixels in the image as the Whitepoint and Blackpoint, respectively. This is ostensibly "calibrating" the other knobs in the tool. Once the black and white points have been set, the Lift and Gain knobs are used to set the new values for the darkest and brightest pixels in the frame. They are, by default, set to 0 and 1, having the effect making the darkest pixel value 0 (pure black) and the brightest value 1 (solid white).
In the 1.0 version of QuickGrade, I did include Blackpoint and Whitepoint controls, but I made them Floating Point Sliders, not RGBA Sliders, so the Eyedropper tool was unavailable for selecting pixels from the image. This has now been rectified.
Compare Side-by-Side and Compare Vertical
I continue to find both of these incredibly simple Gizmos to be indispensable to my day-to-day work. Which would make you think I'd have noticed, long ago, that they didn't work when an image had an alpha channel of solid black.
Especially considering that the Gizmos already had the Shuffle nodes in them to replace the alpha with solid white. But, for some idiotic reason, I left the Shuffle nodes in their default configuration, doing nothing at all to the image. This has now been rectified and these Gizmos will work with all images.
Go Get 'Em
The Downloads page has been updated with the latest versions of the Gizmos, so head on over there to get your updates. Seacrest out.